
A missing process flow diagram once cost one of our U.S. clients three months of rework on a bracket order — a problem we could have caught before production even started.
To ask suppliers for a process flow diagram when purchasing stamping parts, include it as a mandatory deliverable in your RFQ, specify AIAG-standard formatting, and require that every step — from raw material receipt through final packing — links directly to the Control Plan and PFMEA documentation.
This article walks you through exactly what to request, how to phrase it, and what to look for when reviewing a supplier’s process flow diagram. Whether you source mounting brackets, spring clamps, or complex multi-planar stamped components, this guide will help you avoid costly quality failures.
How do I know which process steps my supplier should include in the flow diagram?
Last year, a buyer came to us after receiving stamped clips 1 from another supplier that had skipped a critical deburring step. The parts looked fine but failed assembly because sharp edges prevented proper seating in the mounting channel.
Your supplier's process flow diagram should include every step from coil receipt and material verification through blanking, piercing, forming, secondary finishing operations, in-process inspection points, packing, and shipment — with no hidden steps omitted from the documented sequence.

Why "Hidden" Steps Matter More Than You Think
Most buyers think of stamping as a single operation. In reality, even a simple Z-shaped mounting clip like the ones we produce for U.S. clients goes through multiple discrete stages. Progressive die stamping may handle blanking, piercing, and initial forming in one press cycle. But what happens after the part leaves the die? Deburring, degreasing, stress-relieving, plating, and final inspection are all separate steps. If any of these are missing from the process flow diagram, you have a blind spot in your quality system.
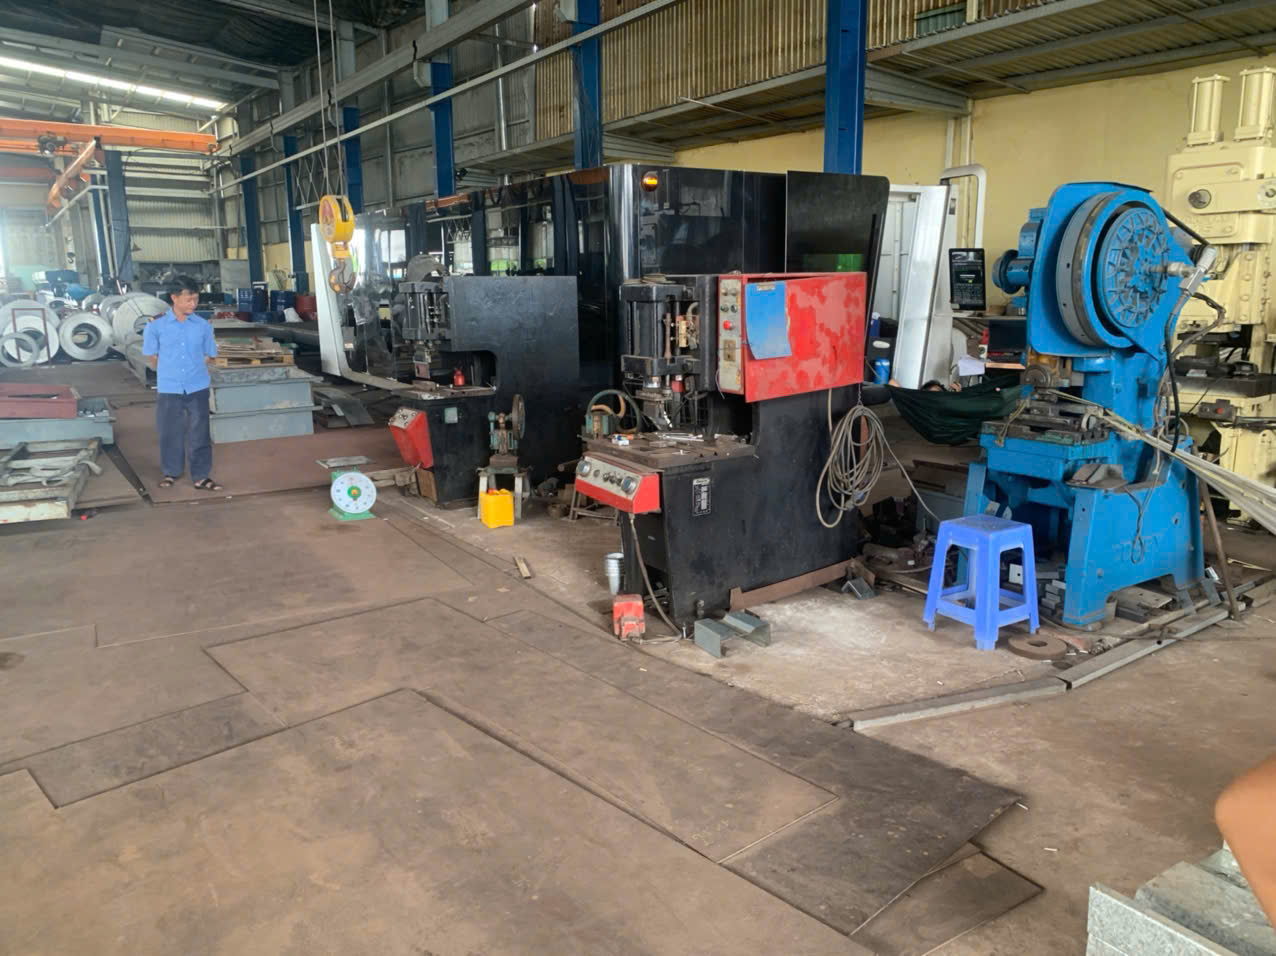
When our team in Vietnam audits a stamping supplier, the first thing we check is whether the diagram accounts for material handling between stations. A bracket that moves from the stamping press 2 to a plating line can pick up contamination or suffer physical damage in transit. The process flow diagram should show this movement explicitly.
The Minimum Steps to Demand
Here is a baseline checklist of process steps that should appear in any stamping part's flow diagram:
| Step Number | Process Step | Key Output |
|---|---|---|
| 1 | Raw Material Receipt | Coil/heat number logged, material cert verified |
| 2 | Material Storage | Segregation rules to prevent alloy mixing |
| 3 | Coil Loading / Setup | Die setup, first-article check |
| 4 | Stamping (Blanking, Piercing, Forming) | Parts produced per progressive die sequence |
| 5 | Deburring / Edge Treatment | Removal of sharp edges, burrs |
| 6 | Secondary Operations (Welding, Tapping) | Sub-assemblies completed if applicable |
| 7 | Surface Treatment (Plating, Coating) | Zinc-galvanized or other finish applied |
| 8 | In-Process Inspection | Dimensional checks, visual inspection |
| 9 | Final Inspection | Full layout per Control Plan |
| 10 | Packing and Labeling | Lot ID transferred to shipping label |
| 11 | Shipment | Parts dispatched with documentation |
If your supplier's diagram has fewer than eight steps for a stamped bracket with a plated finish, something is missing. Ask about it directly.
Family Parts vs. Unique Parts
For "families" of similar brackets — say, four mounting clips 3 that share the same material and die logic but differ in hole patterns — a single process flow diagram may be acceptable. But this only works if the supplier can demonstrate commonality across the family. New part numbers with different geometries, tolerances, or finishes always require their own validated flow diagram. This is an APQP requirement that many suppliers overlook.
What information should I request to ensure the process flow diagram matches my drawing requirements?
One trade-off we constantly weigh at DEWIN is how much documentation to demand upfront versus what to verify during a supplier audit. The answer for process flow diagrams is simple: demand everything in the RFQ, and verify it on the shop floor.
Request that each process step in the flow diagram references the specific drawing dimensions it controls, marks all special characteristics (Critical and Significant), and uses step numbers that match the PFMEA and Control Plan exactly — creating a unified, traceable PPAP submission package.

Embedding the Request in Your RFQ
Do not simply write "please provide a process flow diagram" in your RFQ. That vague language gives suppliers room to send a generic, one-box flowchart. Instead, be specific. Here is a sample paragraph you can paste into your next RFQ:
"Supplier shall provide a process flow diagram in AIAG-standard format covering all operations from raw material receipt through shipment. The diagram must identify all in-process inspection points, special characteristics per the engineering drawing, and use step numbers consistent with the corresponding PFMEA and Control Plan. PPAP Level 3 4 submission is required."
This phrasing leaves no room for interpretation. It tells the supplier exactly what format to use, what to include, and how it links to the broader PPAP submission package.
Linking the Diagram to Your Drawing
The drawing is the source of truth. Every critical dimension, tolerance, and surface finish callout on your drawing should trace back to a specific step in the process flow diagram. If your bracket drawing calls out a ±0.05 mm hole position tolerance, the diagram must show where that hole is punched and where it is inspected.
Here is how the linkage should work:
| Drawing Requirement | PFD Step | Control Plan Line | PFMEA RPN |
|---|---|---|---|
| Hole diameter 6.0 ±0.1 mm | Step 4 – Piercing | CP-004 | 120 |
| Bend angle 90° ±1° | Step 4 – Forming | CP-005 | 150 |
| Zinc plating 8–12 µm | Step 7 – Plating | CP-007 | 80 |
| Overall length 85 ±0.2 mm | Step 4 – Blanking | CP-003 | 100 |
| Surface roughness Ra 1.6 | Step 5 – Deburring | CP-006 | 60 |
If the supplier cannot produce this type of cross-reference, their quality system is disconnected. The Control Plan alignment between these documents is what separates a reliable supplier from one that ships non-conforming parts.
Special Characteristics and PPAP Levels
When we manage PPAP for our clients, we insist that all Critical and Significant characteristics 5 are explicitly marked on the process flow diagram — typically with a diamond or star symbol per AIAG convention. These marks tell the quality team which steps require statistical process control 6, capability studies, or 100% inspection.
For stamping parts used in automotive or safety-critical applications, PPAP Level 3 is standard. This means the supplier must submit the full package: process flow diagram, PFMEA documentation, Control Plan, dimensional results, material certs, and capability studies. For lower-risk parts, Level 1 or 2 may suffice, but the process flow diagram is non-negotiable at every level.
Our experience managing suppliers across Vietnam and China has shown us that IATF 16949 standards 7 provide the strongest framework for this documentation chain. Even if your supplier is not IATF-certified, asking them to follow these formatting standards raises the bar significantly.
How can I use the process flow diagram to verify my supplier's quality control checkpoints?
A lesson we learned early in our supplier quality management practice: the process flow diagram is not just a picture of how parts are made. It is a map of where things can go wrong — and where the supplier has placed guards to catch problems.
Use the process flow diagram to confirm that every high-risk operation has a defined inspection gate, that reject loops clearly show how non-conforming parts are isolated and dispositioned, and that the diagram's inspection points align with the Control Plan's measurement methods and frequencies.

Reading the Diagram Like an Auditor
When our quality engineers review a supplier's process flow diagram, they do not just read it top to bottom. They ask three questions at every step:
- What could go wrong here?
- How would the supplier detect it?
- What happens to the bad parts?
If the diagram does not answer all three questions at critical steps, the manufacturing feasibility analysis is incomplete. A well-designed diagram includes decision diamonds at inspection gates — pass goes forward, fail goes to a clearly defined reject loop. That reject loop should specify isolation, labeling, root cause analysis, and disposition (scrap, rework, or return to previous step).
Mapping Inspection Points to the Control Plan
The process flow diagram tells you where inspection happens. The Control Plan tells you how. These two documents must talk to each other perfectly. Here is what to cross-check:
| PFD Inspection Point | What to Verify in Control Plan | Red Flag if Missing |
|---|---|---|
| First-Article Inspection (Step 3) | Sample size, measurement tools, acceptance criteria | No FAI means the die setup is unvalidated |
| In-Process Dimensional Check (Step 4) | Frequency (e.g., every 500 pcs), specific dimensions checked | Unchecked dimensions drift during long runs |
| Plating Thickness Check (Step 7) | Measurement method (X-ray fluorescence, magnetic gauge) | Plating defects are the #1 cause of field failures on brackets |
| Final Layout Inspection (Step 9) | Full dimensional report per drawing, visual criteria | Shipping uninspected parts is a PPAP violation |
Reject Loops and Non-Conformance Protocols
I have seen suppliers present a process flow diagram that shows a beautiful straight line from coil to shipping container — with zero reject loops. That is not a process. That is a fantasy. Every real stamping operation produces some non-conforming parts. The question is how the supplier handles them.
A good diagram will show a reject path at each inspection gate. The path should lead to a quarantine area, then to a disposition decision (scrap, rework, or concession). If the supplier's diagram does not include this, ask them directly: "What happens when a part fails inspection at Step 4?" Their answer — or lack of one — tells you everything about their actual quality culture.
For our U.S. clients who require in-process inspection points at multiple stages, we ensure the supplier documents not just the inspection step but also the feedback loop. If a dimensional drift is detected at Step 4, does the operator stop the press and adjust the die? Or do parts keep running while someone writes a report? The diagram should make this clear.
What red flags should I watch for if a supplier hesitates to share a detailed process flow diagram?
During a recent supplier audit in Southeast Asia, we asked a stamping factory for their process flow diagram for a set of precision brackets. The plant manager said, "We will prepare it for you next week." That single sentence told us they did not have one.
If a supplier hesitates, provides a generic template, cannot match step numbers to their PFMEA, or claims the process flow diagram is "confidential," these are serious red flags indicating either a nonexistent quality system or a process they do not want you to see.

The Five Warning Signs
Over years of managing supplier relationships for custom stamping parts, our team has compiled a reliable list of red flags. Here they are, ranked by severity:
1. The diagram arrives as a generic template. If the flow diagram looks like it could apply to any stamped part — no specific dimensions called out, no special characteristics marked, no unique step descriptions — the supplier copied it from a textbook. A real process flow diagram is specific to your part number.
2. Step numbers do not match the Control Plan or PFMEA. This is the single most common sign of a fragmented quality system. If the PFD says "Step 5 – Forming" but the Control Plan lists forming as "CP-003," the documents were created independently and never reconciled. This violates basic APQP requirements.
3. The supplier calls it "confidential." Some suppliers claim their process flow is proprietary. While tooling designs may be confidential, the sequence of operations is not. Any supplier compliant with IATF 16949 standards or participating in a PPAP submission understands that the process flow diagram is a customer-required deliverable. Refusal to share it is a disqualifier.
4. No traceability from material cert to finished part. If the diagram starts at "Stamping" and skips raw material receipt entirely, the supplier cannot prove that the correct material went into your parts. For parts like zinc-galvanized mounting brackets 9, where material composition affects plating adhesion, this gap is critical.
5. No reject loops appear anywhere. As I mentioned earlier, a diagram with no reject paths is not reflecting reality. It suggests the supplier either does not inspect or does not document what happens to failed parts.
What to Do When You See Red Flags
Do not immediately disqualify a supplier over a single red flag. Instead, use the gap as leverage. Tell them exactly what you need and give them a deadline. A supplier who genuinely wants your business will fix the documentation. A supplier who pushes back or keeps stalling is telling you they cannot — or will not — meet your supplier quality management standards.
At DEWIN, when we identify these gaps during a supplier audit, we provide the factory with a corrective action request and a template that meets AIAG standards. We then re-audit within 30 days. This approach has helped us develop reliable stamping suppliers across Vietnam who now consistently deliver documentation that passes our U.S. clients' incoming quality reviews.
The "Proposed" vs. "Actual" Process Trap
One more thing to watch: the diagram you receive during quoting may be a "proposed" process flow. It looks ideal on paper. But the actual shop floor may operate differently. The only way to verify this is a physical or virtual audit. Ask to see the process running. Compare what you observe to the diagram step by step. If the plating line shown as Step 7 is actually outsourced to a sub-tier supplier not mentioned in the diagram, you have a transparency problem that no document can fix.
Conclusion
A process flow diagram is not paperwork — it is the clearest window into how your stamping supplier actually controls quality, traceability, and risk across every production step.
Frequently Asked Questions
How do I know which process steps my supplier should include in the flow diagram?
Last year, a buyer came to us after receiving stamped clips 1 from another supplier that had skipped a critical deburring step. The parts looked fine but failed assembly because sharp edges prevented proper seating in the mounting channel.
What information should I request to ensure the process flow diagram matches my drawing requirements?
One trade-off we constantly weigh at DEWIN is how much documentation to demand upfront versus what to verify during a supplier audit. The answer for process flow diagrams is simple: demand everything in the RFQ, and verify it on the shop floor.
How can I use the process flow diagram to verify my supplier's quality control checkpoints?
A lesson we learned early in our supplier quality management practice: the process flow diagram is not just a picture of how parts are made. It is a map of where things can go wrong — and where the supplier has placed guards to catch problems.
Footnotes
1. ScienceDirect provides a technical overview of the stamping process and the components produced through this manufacturing method. ↩︎
2. Wikipedia entry explaining the mechanics and function of a stamping press in industrial manufacturing environments. ↩︎
3. Wikipedia page detailing various types of hardware clips used in mechanical assembly and fastening. ↩︎
4. Official AIAG page for the Production Part Approval Process, detailing the requirements for Level 3 submissions. ↩︎
5. AIAG resource explaining the identification and management of significant characteristics within the IATF 16949 framework. ↩︎
6. Explains SPC methodology used to monitor marked special characteristics on stamped parts. ↩︎
7. The official site for the IATF 16949 standard, essential for automotive quality management systems. ↩︎
8. ASQ resource defining the role of inspection and quality gates in manufacturing process control. ↩︎
9. Background on galvanization explains plating adhesion issues mentioned for these brackets. ↩︎