When our team helps U.S. clients source custom sheet metal parts 1 from Vietnam and other Asian suppliers, tooling amortization is the single most misunderstood line item in every quote — and it silently reshapes your total cost of ownership 2.
Tooling amortization when sourcing sheet metal fabrication means spreading the upfront cost of stamping dies, press-brake tooling, and welding fixtures across an agreed production volume, converting a large capital expense into a small per-part adder that preserves cash, clarifies ownership, and demands clear true-up terms in every contract.
This article walks you through every angle of the decision — from calculating the adder per part to negotiating ownership after the run ends press-brake tooling 3. Whether you are quoting progressive stamping dies 4 or simple form tooling, these frameworks will help you compare suppliers on equal footing.
How does tooling amortization impact my total landed cost per part?
A question I hear on nearly every call with purchasing managers: "Why is Supplier A's piece price lower, but my landed cost ends up higher?" Nine times out of ten, the answer hides inside the tooling amortization structure buried in the quote progressive stamping dies 5.
Tooling amortization directly raises or lowers your total landed cost per part by adding a per-unit surcharge that reflects the tooling investment divided by the committed volume; a $15,000 stamping die spread over 50,000 parts adds just $0.30 per unit, but over only 10,000 parts that adder jumps to $1.50.
Understanding the Amortization Adder
The math is straightforward. Take the total tooling cost and divide it by the planned production volume. That number is the amortization adder — a surcharge on every part. It sits on top of your base piece price, which covers material, machine time, labor, and overhead.
The problem is that many suppliers do not break this out. They fold the adder into the unit cost, and suddenly one quote looks cheaper than another when the real difference is volume assumption, not manufacturing efficiency.
Here is a quick reference for common sheet metal tooling costs and how the adder changes at different volumes:
| Tooling Type | Typical Cost Range | Adder at 5,000 Parts | Adder at 25,000 Parts | Adder at 50,000 Parts |
|---|---|---|---|---|
| Progressive stamping die | $800 – $30,000 | $0.16 – $6.00 | $0.03 – $1.20 | $0.016 – $0.60 |
| Custom form tooling 6 | $150 – $1,500 | $0.03 – $0.30 | $0.006 – $0.06 | $0.003 – $0.03 |
| Welding fixtures 7 | $200 – $5,000 | $0.04 – $1.00 | $0.008 – $0.20 | $0.004 – $0.10 |
Why Visibility Matters in Your Cost Breakdown
When we prepare cost breakdowns for clients, the amortization adder always appears as its own line. This is not a trivial formatting choice. If the adder disappears into the unit price, you cannot compare two suppliers with different volume assumptions on equal terms.
Imagine Supplier A quotes $2.80 per part with tooling amortized over 100,000 units, while Supplier B quotes $3.10 per part with non-recurring engineering costs paid upfront. Without separating the adder, Supplier A looks 10% cheaper. But if your actual volume will be 20,000 parts, Supplier A's true piece price might be $3.50 once the remaining tooling balance is trued up. Always demand a line-item breakdown.
The Volume Threshold Question
For volumes below roughly 500 to 1,000 parts per year, laser cutting 8 and bending require no hard tooling investment at all. The setup costs are absorbed into machine time. Above 5,000 parts per year, stamping dies and dedicated fixtures start dominating because the per-stroke cycle cost drops dramatically. The crossover point — often between 5,000 and 20,000 annual units — is where amortization decisions have the biggest financial impact on your program.
Sheet metal fabrication costs typically range from $5 to $200 or more per part. At the lower end, high-volume stamped brackets with amortized tooling can cost under $5. At the upper end, low-volume complex assemblies with multiple bends and tight tolerances carry a heavy per-unit setup burden. Understanding how unit price differs between mass production and small-batch runs is critical when evaluating these cost structures.
What are the risks to my budget if my production volume doesn't meet the amortization target?
Last year, a client came to us after their previous supplier invoiced them for $12,000 in unamortized tooling balance — a cost they never budgeted for. Their original forecast was 40,000 parts per year, but actual demand landed at 8,000. The contract had no true-up clause.
If your production volume falls short of the amortization target, you face three budget risks: an inflated per-part adder that erodes margins, a lump-sum true-up payment for the unamortized tooling balance, or a supplier lock-in where you cannot move the part without paying off the remaining tool cost.
The Volume Shortfall Scenario
Consider a progressive stamping die that costs $15,000. You agreed to amortize it over 50,000 parts at $0.30 per unit. After 18 months, you have only ordered 10,000 parts. That means $12,000 of tooling cost remains unamortized. Without a true-up clause, one of three things happens:
- The supplier continues charging $0.30 per part indefinitely until the balance is recovered, but your program may end before that.
- The supplier invoices you for the $12,000 balance when the contract ends or when you request a tooling transfer.
- The supplier quietly retains ownership of the tool, and you cannot move the part to a different vendor without building a new die elsewhere.
Each of these outcomes damages your budget or your flexibility. The third option is especially painful if you want to re-source to a different country or a more competitive supplier.
How True-Up Clauses Protect You
A true-up clause defines what happens when cumulative shipments do not reach the agreed volume. It should specify:
- When the true-up is triggered (e.g., at 12-month intervals, at contract end, or when cumulative orders fall below a trajectory).
- How much the buyer pays (typically the unamortized balance, calculated as total tooling cost minus the per-part adder already collected).
- When the adder stops (verified against cumulative shipment records, not calendar time).
Without these terms, you are exposed to open-ended financial risk. I always recommend our clients negotiate true-up language before the first purchase order, not after volumes start slipping.
Supplier Lock-In Risk
When the supplier funds the tooling, they hold leverage. You cannot move the part without either paying the unamortized balance or investing in a new tool at the next supplier. This is not inherently bad — but you need to know it upfront. Some suppliers use this structure intentionally to strengthen their hold on your business. Transparency in supplier selection is key: ask who owns the tool, what happens at end of contract, and what the buyout price is at any point during the amortization period.
| Scenario | Volume Achieved | Adder per Part | Unamortized Balance | Budget Impact |
|---|---|---|---|---|
| On-target | 50,000 | $0.30 | $0 | None |
| 50% shortfall | 25,000 | $0.30 (collected) | $7,500 | True-up payment or lock-in |
| 80% shortfall | 10,000 | $0.30 (collected) | $12,000 | Major budget overrun |
| Volume exceeds target | 75,000 | $0.30 (should stop at 50K) | $0 (overpaid $7,500) | Adder should stop; verify |
The last row highlights an often-overlooked risk: if you exceed the target volume, the adder should stop. Verify that the contract specifies this cutoff, tied to cumulative shipments.
Can I negotiate to own the sheet metal tooling after the amortization period ends?
One of the first questions our Vietnam team asks when reviewing a new supplier agreement is: "Who holds title to the tooling after the agreed volume is reached?" The answer shapes your long-term flexibility more than most buyers realize.
Yes, you can and should negotiate full ownership of sheet metal tooling after the amortization period ends; cost amortization with an ownership transfer clause gives you the best return on investment because the stamping dies, form tooling, and welding fixtures remain yours for reuse in future projects or transfer to an alternative supplier.
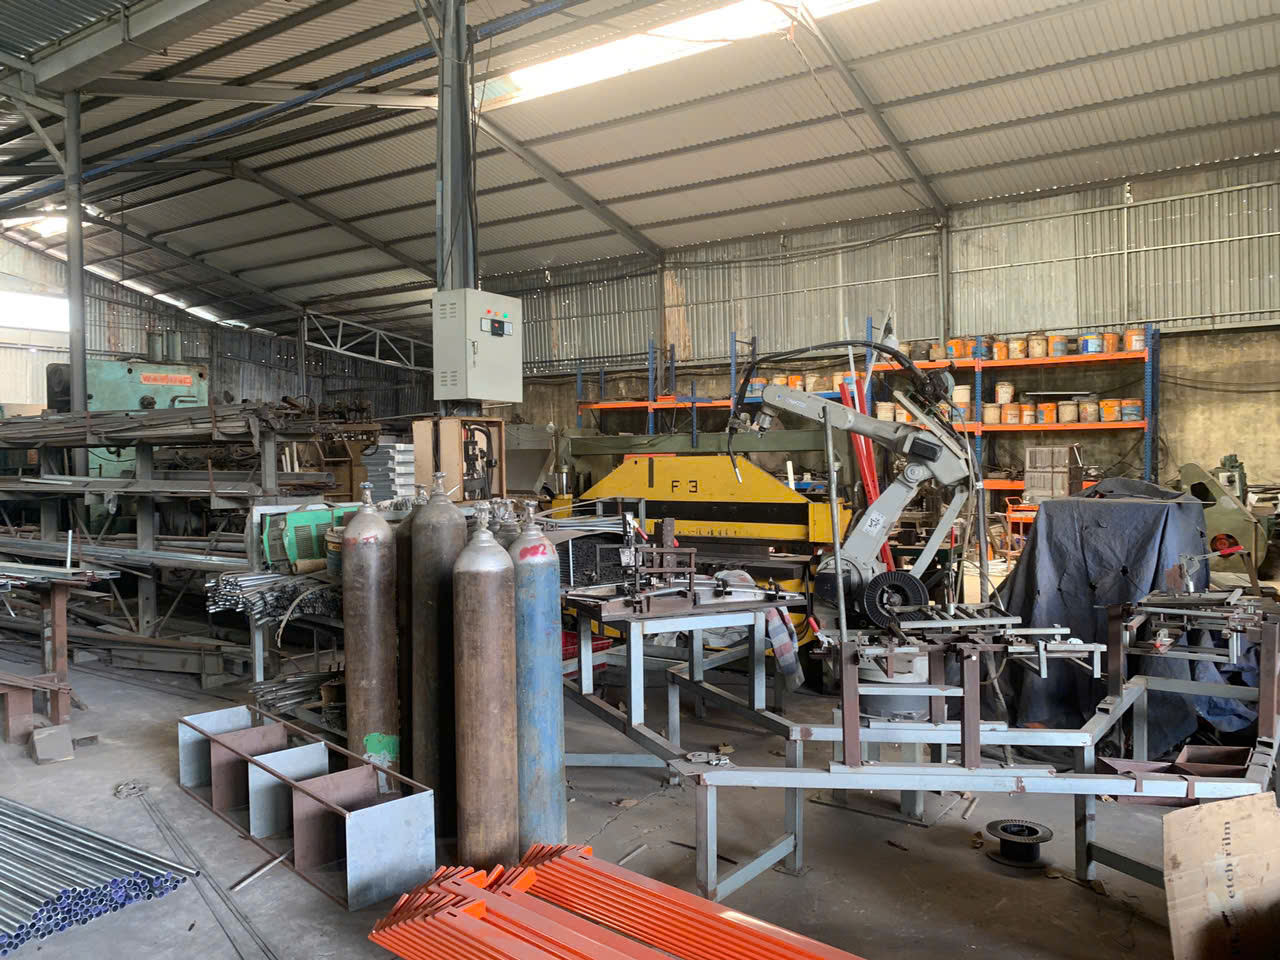
Comparing Tooling Ownership Structures
Not all tooling arrangements are equal. Below is a decision matrix that compares the four most common structures buyers encounter when sourcing sheet metal fabrication:
| Structure | Upfront Cost | Ownership | Hidden Fees | Best For |
|---|---|---|---|---|
| Upfront NRE (buyer pays 100%) | High | Buyer from day one | None | Stable high-volume programs |
| Amortized tooling | Low (spread over parts) | Buyer after amortization complete | Possible true-up | Growing programs with cash constraints |
| Partial ownership | Medium | Shared or conditional | Possible exit fees | Uncertain volumes, risk-sharing |
| "Free" tooling | Zero apparent | Supplier retains | Often built into piece price | Very low volumes, relationship-building |
The "free" tooling option deserves scrutiny. When a supplier offers tooling at no charge, the cost is almost always embedded in a higher piece price. You pay for it eventually. And you do not own the tool — which means you cannot move the part without starting over.
How to Structure the Ownership Clause
When negotiating, specify these points in writing:
- Title transfer happens automatically once cumulative shipments reach the agreed volume.
- Physical transfer can be requested at any time after title transfers; the supplier must release the tool within a defined timeframe (typically 30 to 60 days).
- Maintenance obligation during the amortization period rests with the supplier; after transfer, the buyer assumes responsibility.
- Tool condition at transfer should be documented with photos and a tool life estimate.
I have seen contracts where the ownership clause was vague — it said the buyer "may" request the tool but did not specify a timeline or condition. That ambiguity cost one client four months of delays when they tried to re-source the part. For practical guidance on structuring these negotiations, understanding how to negotiate tooling cost amortization is essential.
Tool Life and Maintenance Costs
Tool life is a factor many buyers overlook. A progressive stamping die might last 500,000 to 1,000,000 strokes, but that depends on material hardness, maintenance schedules, and part complexity. If your amortization period covers only a fraction of the tool life, you inherit a tool with significant remaining value. If the tool is near end of life, you inherit a maintenance liability.
Accurate amortization calculations should factor in periodic maintenance, sharpening, and reconditioning. Ask your supplier for a maintenance log and projected tool life at the point of transfer. This data helps you estimate whether the tool will serve future production runs or need replacement — and whether disposal or recycling costs apply.
Some fabricators now offer "Tooling-as-a-Service" models where the tool cost is fully integrated into a per-part fee. This shifts all capital expenditure and amortization responsibility to the supplier. It can simplify accounting, but it also means you never own the tool. For buyers who value flexibility and long-term cost control, outright ownership after amortization remains the stronger position.
Is it more cost-effective for my business to pay for tooling upfront or through amortization?
During a recent project review with a U.S.-based sourcing firm, their finance director asked us to model both scenarios — upfront payment versus amortized — for a set of custom mounting brackets. The exercise revealed that the "right" answer depends on three variables: volume certainty, cash position, and accounting preference.
Paying for tooling upfront is more cost-effective when your production volume is confirmed and your cash position is strong, because you avoid the per-part adder and own the tool immediately; amortization is better when cash flow is tight, volumes are uncertain, or your finance team prefers to classify tooling as an operating expense rather than a capital expenditure.

CapEx vs. OpEx: Why Your Finance Team Cares
Paid-up tooling is typically capitalized on the balance sheet as a fixed asset. It gets depreciated over its useful life according to your accounting rules. An amortized tooling adder, on the other hand, flows through cost of goods sold as an operating expense. This distinction matters for tax treatment, cash flow reporting, and budget allocation.
For startups and small-to-midsize enterprises, the OpEx path is often preferred. It avoids a large upfront hit to cash reserves and keeps the tooling cost inside the per-part economics. For larger companies with strong balance sheets and stable demand forecasts, the CapEx path can be cheaper overall because the total tooling cost is fixed and there is no risk of a true-up payment.
A Side-by-Side Cost Comparison
Let us model a real scenario. You need a progressive stamping die for a custom bracket. The die costs $15,000. Your forecast is 50,000 parts over two years.
| Factor | Upfront NRE | Amortized ($0.30/part) |
|---|---|---|
| Initial cash outlay | $15,000 | $0 |
| Per-part adder | $0 | $0.30 |
| Total tooling cost at 50,000 parts | $15,000 | $15,000 |
| Total tooling cost at 25,000 parts (shortfall) | $15,000 | $7,500 paid + $7,500 true-up |
| Ownership timing | Immediate | After 50,000 parts shipped |
| Accounting treatment | CapEx (depreciation) | OpEx (COGS) |
| Supplier lock-in risk | Low (you own the tool) | Moderate (until amortization complete) |
At full volume, the total tooling cost is identical. The difference is timing and risk. If volume falls short with the amortized option, the true-up clause determines whether you pay the balance or walk away from the tool. With upfront payment, you have already paid — the tool is yours regardless of volume. For a deeper look at how these tooling costs are calculated and amortized, review the full calculation methodology.
Design for Manufacturability Reduces Both Options' Cost
Regardless of which payment structure you choose, design for manufacturability 10 can dramatically lower the tooling investment itself. Here are the highest-impact DFM decisions for sheet metal:
- Standardize bend radii. Using a single internal bend radius equal to material thickness across all bends allows one die setup for the entire part. This reduces tooling cost and shortens the amortization burden.
- Minimize weld count. Fewer welds mean simpler welding fixtures and lower fixture costs.
- Use standard punch-form features. Standardized sizes for bridge lances, embossments, and ribs avoid custom toolsets and manufacturing delays.
- Keep internal bend radii between 0.030 inches and material thickness. Most shops carry standard tooling for this range, so you avoid prototype tooling or specialized toolsets.
- Consolidate orders. Grouping multiple part numbers into a single production run spreads setup costs across more units.
These steps reduce the tooling cost itself, which makes both upfront and amortized paths cheaper. On our projects, we run a DFM review before finalizing any tooling quote. It is the single most effective way to cut unit cost before production even starts.
When Each Option Makes Sense
- Choose upfront NRE when your volume forecast is firm, your cash position is strong, and you want immediate tool ownership with no supplier lock-in.
- Choose amortization when cash flow is constrained, volumes are ramping up, or your accounting team prefers OpEx treatment.
- Consider partial ownership or Tooling-as-a-Service when volumes are highly uncertain and you want to limit downside risk — but accept that flexibility comes at a higher effective per-part cost.
The cheapest quote is rarely the lowest total cost of ownership. Factor in rework risk, inspection gaps, communication overhead, and the financial terms around tooling. That full picture is what separates a good sourcing decision from a costly one.
Conclusion
Evaluating tooling amortization when sourcing sheet metal fabrication comes down to visibility, ownership, true-up terms, and honest volume forecasting — get those right, and you protect both your budget and your flexibility.
Frequently Asked Questions
How does tooling amortization impact my total landed cost per part?
A question I hear on nearly every call with purchasing managers: "Why is Supplier A's piece price lower, but my landed cost ends up higher?" Nine times out of ten, the answer hides inside the tooling amortization structure buried in the quote progressive stamping dies 5 .
What are the risks to my budget if my production volume doesn't meet the amortization target?
Last year, a client came to us after their previous supplier invoiced them for $12,000 in unamortized tooling balance — a cost they never budgeted for. Their original forecast was 40,000 parts per year, but actual demand landed at 8,000. The contract had no true-up clause.
Can I negotiate to own the sheet metal tooling after the amortization period ends?
One of the first questions our Vietnam team asks when reviewing a new supplier agreement is: "Who holds title to the tooling after the agreed volume is reached?" The answer shapes your long-term flexibility more than most buyers realize.
Footnotes
1. Explains the process of creating sheet metal parts through various techniques. ↩︎
2. Provides a comprehensive definition of total cost of ownership. ↩︎
3. Explains press brake tooling as equipment used to create bends in sheet metal. ↩︎
4. Replaced HTTP 403 with an article explaining what stamping dies are and how they are made. ↩︎
5. Explains progressive die stamping as a process for efficient, cost-effective manufacturing. ↩︎
6. Explains form tooling’s role in creating manufacturable features in sheet metal parts. ↩︎
7. Replaced HTTP unknown with an article explaining what welding fixtures are and their role in productivity. ↩︎
8. Replaced HTTP 404 with an authoritative guide on laser cutting from TWI (The Welding Institute). ↩︎
9. Defines total landed cost as the sum of all costs to get a product to the customer. ↩︎
10. Outlines key DFM principles for optimizing product design for manufacturing. ↩︎