Rust spots on stainless steel in sheet metal fabrication 1 alarmed our team during a recent batch inspection — the parts looked flawed, but the steel was perfectly fine.
Rust spots on stainless steel in sheet metal fabrication are almost always caused by free iron contamination from carbon steel tools, grinding debris, or improper handling — not by a defect in the stainless steel itself. Chemical cleaning with oxalic or phosphoric acid removes these spots effectively, and strict prevention protocols during fabrication ensure long-term corrosion resistance.
This article breaks down the root causes, the best removal methods, prevention strategies, and how to audit your supplier’s processes. Whether you source custom parts from Asia or run your own shop, these steps will save you time, money, and frustration.
How can I prevent surface contamination and rust during the sheet metal fabrication process?
A few years back, one of our U.S. clients received a shipment of 304 stainless steel mounting brackets from a supplier in Southeast Asia. They looked perfect — until brown spots appeared within weeks. Our Vietnam office traced the issue to a single shared grinding wheel.
To prevent surface contamination and rust during sheet metal fabrication, you must segregate stainless steel tooling from carbon steel tooling, clean work surfaces between jobs, control handling with lint-free gloves, and store stainless parts separately to avoid contact with ferrous materials at every stage.
Why Contamination Happens in the First Place
Stainless steel resists rust because of its chromium oxide layer 2 — a thin, self-healing film that forms when chromium reacts with oxygen. But this layer only protects the stainless steel itself. When tiny particles of carbon steel land on the surface, those particles rust. The rust looks like it belongs to the stainless part, but it does not.
Common sources of free iron contamination 3 include:
- Grinding wheels or cutting discs previously used on carbon steel
- Carbon steel clamps, vises, or fixtures
- Steel wool or wire brushes
- Airborne grinding dust in a shared shop
- Storage racks made from mild steel
The Segregation Principle
The single most effective prevention step is a dedicated "stainless-only" workflow. This means separate tools, separate storage, and ideally separate work areas. On our production floor, we color-code stainless steel tools with green tape. Carbon steel tools get red tape. It is a simple system, but it eliminates most cross-contamination risks.
| Fabrication Stage | Contamination Risk | Prevention Action |
|---|---|---|
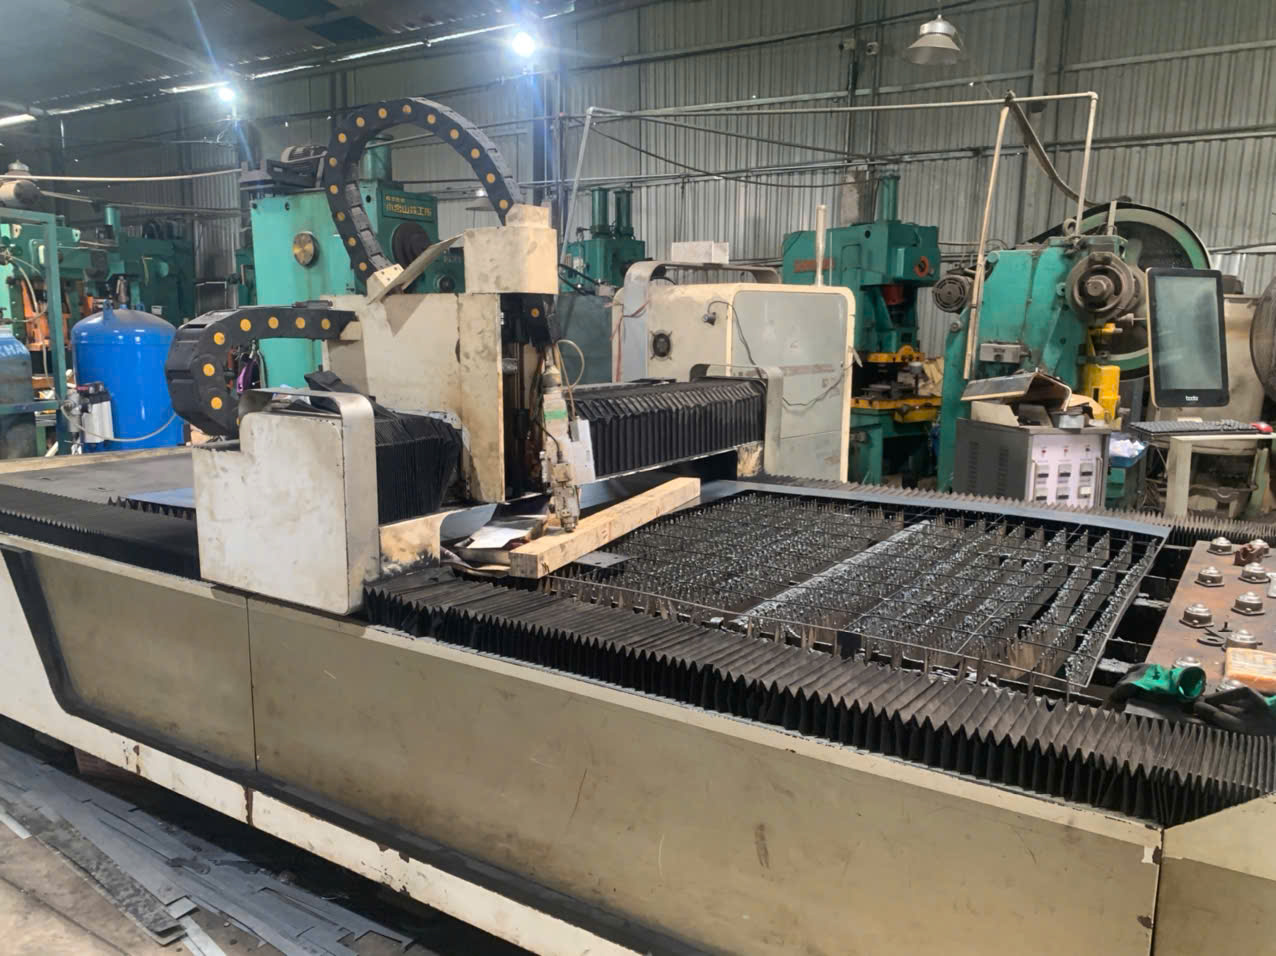
| Cutting | Shared saw blades or laser beds with carbon steel residue | Use dedicated blades; clean laser beds before each stainless job |
| Grinding / Deburring | Abrasive wheels carrying carbon steel particles | Dedicate wheels to stainless only; never share |
| Welding | Carbon steel wire brushes for post-weld cleaning | Use stainless steel brushes and stainless filler wire |
| Handling / Transport | Bare hands leave salt deposits; carbon steel racks | Use lint-free gloves; store on wooden or plastic-coated racks |
| Storage | Humid conditions; proximity to carbon steel parts | Wrap parts in VCI paper; separate from ferrous inventory |
Handling and Storage Best Practices
After parts leave the fabrication cell, contamination risks continue. I have seen cases where perfectly clean parts developed rust spots simply because they sat on a carbon steel shelf in a humid warehouse. Moisture accelerates the oxidation of any iron particles on the surface.
We recommend wrapping finished stainless parts in VCI (Vapor Corrosion Inhibitor) paper 4 or polyethylene film. If parts must be stored for more than a few days before shipping, a light coat of wax or water-displacing lubricant adds an extra layer of protection. Dry the parts thoroughly before packaging — water deposits alone can cause surface staining over time.
Post-Weld Cleaning Matters
Welding introduces heat tint 5 — that rainbow discoloration around the weld zone. Heat tint is not rust. It is a thickened oxide layer that has a different composition than the normal chromium oxide layer. This altered layer offers less corrosion resistance. If the part will operate in a corrosive environment, post-weld cleaning is not optional. Pickling paste or mechanical removal of the heat tint restores the protective layer.
What are the most effective chemical treatments I should use to remove rust spots from my custom parts?
Last quarter, a purchasing manager in Ohio sent us photos of 316 stainless steel brackets with scattered brown spots. Before scrapping the batch, we asked him to try a simple oxalic acid 6 wipe. The spots vanished in minutes. The parts were fine underneath.
The most effective chemical treatments for removing rust spots from stainless steel custom parts are oxalic acid solutions for gentle removal without scratching, phosphoric acid for heavier rust, and dilute nitric acid to repassivate the cleaned surface and restore the protective chromium oxide layer.
Chemical vs. Mechanical: Why Chemistry Wins
Mechanical methods — grinding, sanding, buffing — remove material. They change the surface finish. And if you use the wrong abrasive, you can embed new iron particles into the surface, making the problem worse. One of our clients once tried to polish out rust spots with a stainless steel wire wheel from a hardware store. The wheel was not truly stainless — it contained enough iron to seed new rust across the entire part.
Chemical cleaning dissolves the iron contamination without altering the base metal. It is cleaner, more consistent, and safer for the surface finish.
Choosing the Right Chemical
Not every rust spot needs the same treatment. The table below ranks common chemical treatments from mildest to most aggressive.
| Chemical Treatment | Strength | Best For | Key Precaution |
|---|---|---|---|
| Citric acid (food-grade cleaners) | Mild | Light surface staining, food-contact parts | Rinse thoroughly; safe for most environments |
| Oxalic acid (saturated solution) | Moderate | Embedded iron particles, cosmetic rust spots | Apply with soft cloth; do not rub aggressively |
| Phosphoric acid (e.g., Ospho) | Moderate–Strong | Heavier rust deposits | Neutralize with baking soda solution after cleaning |
| Dilute nitric acid (10–20%) | Strong | Repassivation after cleaning; light iron removal | Requires proper PPE; dispose of waste according to local regulations |
| Nitric/Hydrofluoric acid pickling | Very Strong | Heavy contamination, weld scale, heat tint removal | Causes surface etching; hazardous — professional use only |
Step-by-Step Restoration Workflow
Here is the process we follow when a batch arrives with surface staining:
- Inspect: Determine whether the spots are surface staining (cosmetic) or pitting corrosion 7 (material loss). Use a magnifier or borescope.
- Test: Apply a small amount of oxalic acid to a hidden area. If the spots dissolve, it is iron contamination.
- Clean: Apply oxalic acid with a soft cloth. Let it sit for two to three minutes. Do not scrub.
- Rinse: Wash with clean water. For phosphoric acid, neutralize first with a baking soda and water solution.
- Repassivate: Wipe with dilute nitric acid or citric acid to rebuild the chromium oxide layer. This step is critical for parts going into corrosive environments.
- Dry and protect: Dry the part completely. Apply a thin layer of protective wax or oil if the part will be stored before use.
When Chemical Cleaning Is Not Enough
If you see actual pitting — small craters in the surface — chemical cleaning alone will not fix it. Pitting corrosion has already removed base metal. In these cases, mechanical grinding with aluminum oxide abrasives is needed to "bottom out" the pits, followed by chemical repassivation. We flag these parts during incoming inspection so the client can decide whether to rework or reject the batch.
DIY vs. Industrial Solutions
For light staining on non-critical parts, household remedies work surprisingly well. Baking soda paste, white vinegar, or lemon juice can handle minor spots. But for parts destined for food processing, marine, or chemical environments, industrial passivation 8 with nitric or citric acid is the standard. The stakes are too high for shortcuts.
How do I audit my supplier's passivation and finishing processes to ensure long-term corrosion resistance?
During a supplier audit at a Vietnamese fabrication shop last year, I asked to see their passivation tank. The foreman pointed to a plastic bucket of diluted acid under a workbench. No process control. No timer. No concentration monitoring. That single observation explained why their client in Texas kept seeing rust on incoming parts.
To audit your supplier's passivation and finishing processes, verify that they maintain documented procedures for acid bath concentration and immersion time, use dedicated stainless steel tooling, perform post-passivation rinse and dry steps, and conduct salt spray or copper sulfate testing on sample parts to confirm corrosion resistance.
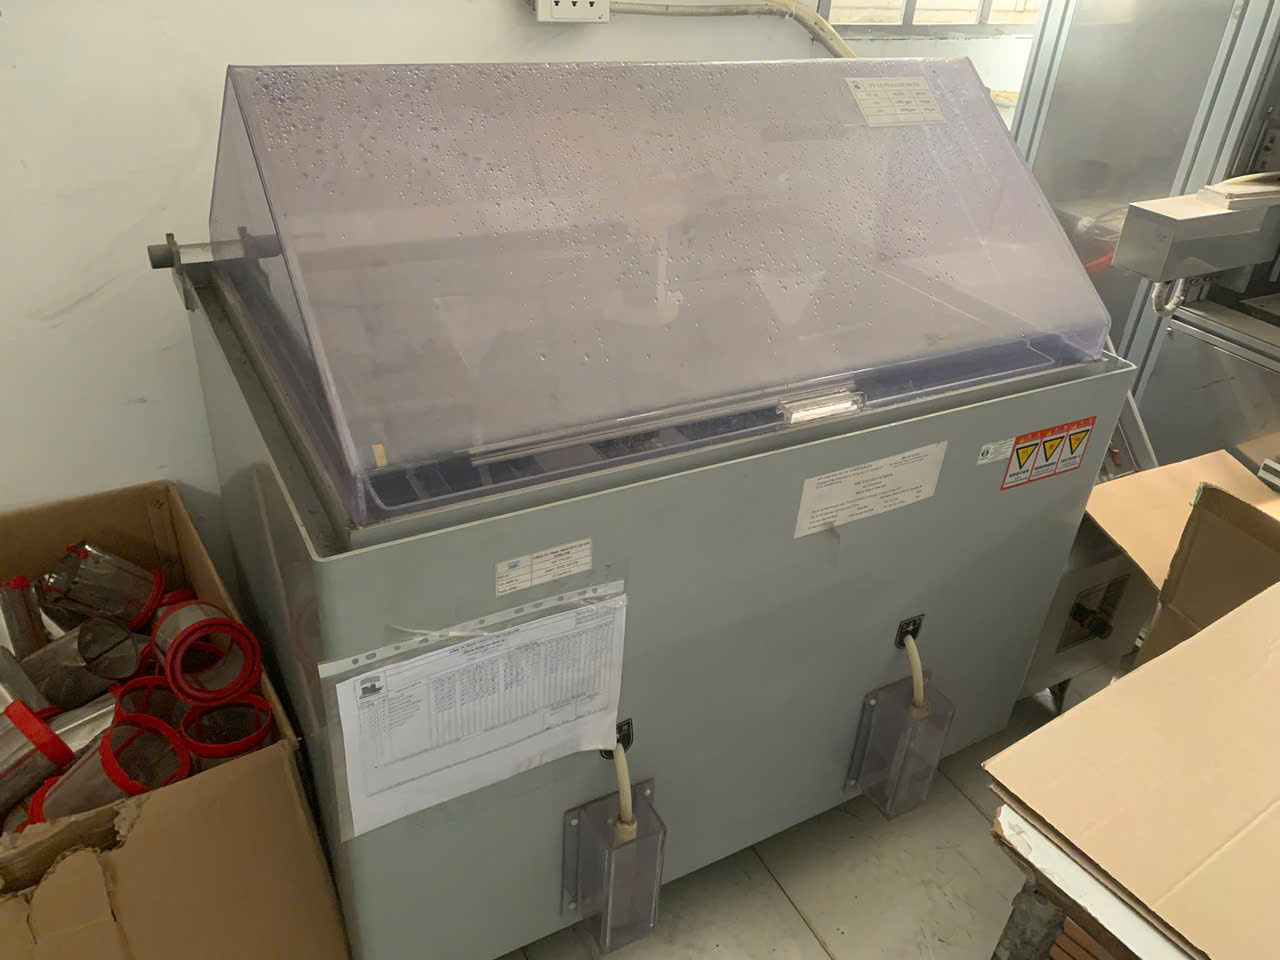
What to Look for on the Factory Floor
Auditing a passivation process is not just about paperwork. You need to observe the actual workflow. Here is what our quality engineers check during a supplier visit:
Tooling segregation: Are stainless steel parts processed with dedicated tools? Look at the grinding area. If carbon steel and stainless parts share the same bench, contamination is inevitable.
Passivation setup: Is the acid bath in a proper tank with temperature and concentration controls? Or is it a makeshift bucket? A controlled passivation process uses either nitric acid (typically 20–50% concentration, 20–50°C, 20–30 minutes) or citric acid (4–10% concentration, ambient to 70°C, 4–30 minutes depending on the grade).
Rinsing: After passivation, parts must be thoroughly rinsed with clean water. Residual acid left on the surface causes more harm than good.
Drying: Parts should be dried with clean, oil-free compressed air or in a drying oven. Air-drying in a humid shop invites water stains.
Key Audit Checklist
| Audit Item | What to Verify | Red Flag |
|---|---|---|
| Passivation procedure document | Written SOP with acid type, concentration, time, temperature | No written procedure exists |
| Acid bath monitoring | Regular concentration testing (titration or test strips) | Bath is "topped off" without testing |
| Tooling control | Color-coded or physically separated stainless tools | Shared grinding wheels, wire brushes |
| Post-passivation testing | Copper sulfate test (ASTM A967 9) or salt spray test on samples | No verification testing performed |
| Surface finish inspection | Visual and Ra measurement against drawing specs | No surface finish requirements on drawing |
| Handling after passivation | Clean gloves, VCI packaging, separated storage | Bare-hand handling, stacked on carbon steel racks |
| Electropolishing 10 capability | Dedicated electropolishing line for high-spec parts | Outsourced without traceability |
Passivation Methods Compared
Not all passivation is equal. The method matters, especially for parts exposed to chloride attack in marine or chemical environments.
Nitric acid passivation is the traditional method. It dissolves free iron from the surface and promotes the formation of a dense chromium oxide layer. Citric acid passivation is newer, less hazardous, and increasingly preferred for environmental reasons. Both are effective when properly controlled.
Electropolishing goes a step further. It removes a thin layer of surface metal electrochemically, leaving an ultra-smooth, chromium-enriched surface with superior corrosion resistance. We recommend electropolishing for parts with complex geometries or parts going into food, pharmaceutical, or marine applications.
PPAP and Process Control
If you are sourcing custom parts through a supply chain partner, ask for PPAP (Production Part Approval Process) documentation that includes passivation records. At our company, we include passivation bath logs, test reports, and surface finish measurements in every PPAP package. This gives the buyer confidence that the process is controlled — not just performed once for the sample and then skipped in production.
The Real Cost of Skipping the Audit
I have watched clients lose months of schedule time because they assumed their overseas supplier "knew how to handle stainless." A proper audit takes one to two days. Reworking or replacing a contaminated batch takes weeks — plus the cost of air freight, customer complaints, and damaged trust. Prevention is always cheaper.
Why am I seeing rust on my 304 or 316 stainless steel components after they arrive from overseas?
A client recently called us, frustrated. He had paid a premium for 316 stainless steel brackets specifically to avoid corrosion problems. Yet the parts arrived from an Asian supplier with rust spots scattered across the surface. His first instinct was that the supplier had shipped the wrong material.
Rust on 304 or 316 stainless steel components after overseas shipping is typically caused by free iron contamination picked up during fabrication, inadequate passivation, exposure to saltwater or humid conditions during ocean transit, or contact with carbon steel packaging materials — not by a defect in the stainless alloy itself.
The "It's Not the Steel" Reality
This is the most common misconception we encounter. Buyers see rust and assume the supplier used inferior material or the wrong grade. In almost every case we have investigated, the stainless steel itself tests correctly. The rust comes from the surface, not from within.
Here is how to tell the difference. Surface contamination rust wipes off or dissolves with mild acid. True pitting corrosion leaves craters in the metal that you can feel with a fingernail. If the rust wipes away cleanly, the steel is fine. The problem is the process, not the material.
Common Contamination Points in the Overseas Supply Chain
When parts travel from an Asian factory to a U.S. warehouse, they pass through many hands and environments. Each transition is a contamination risk.
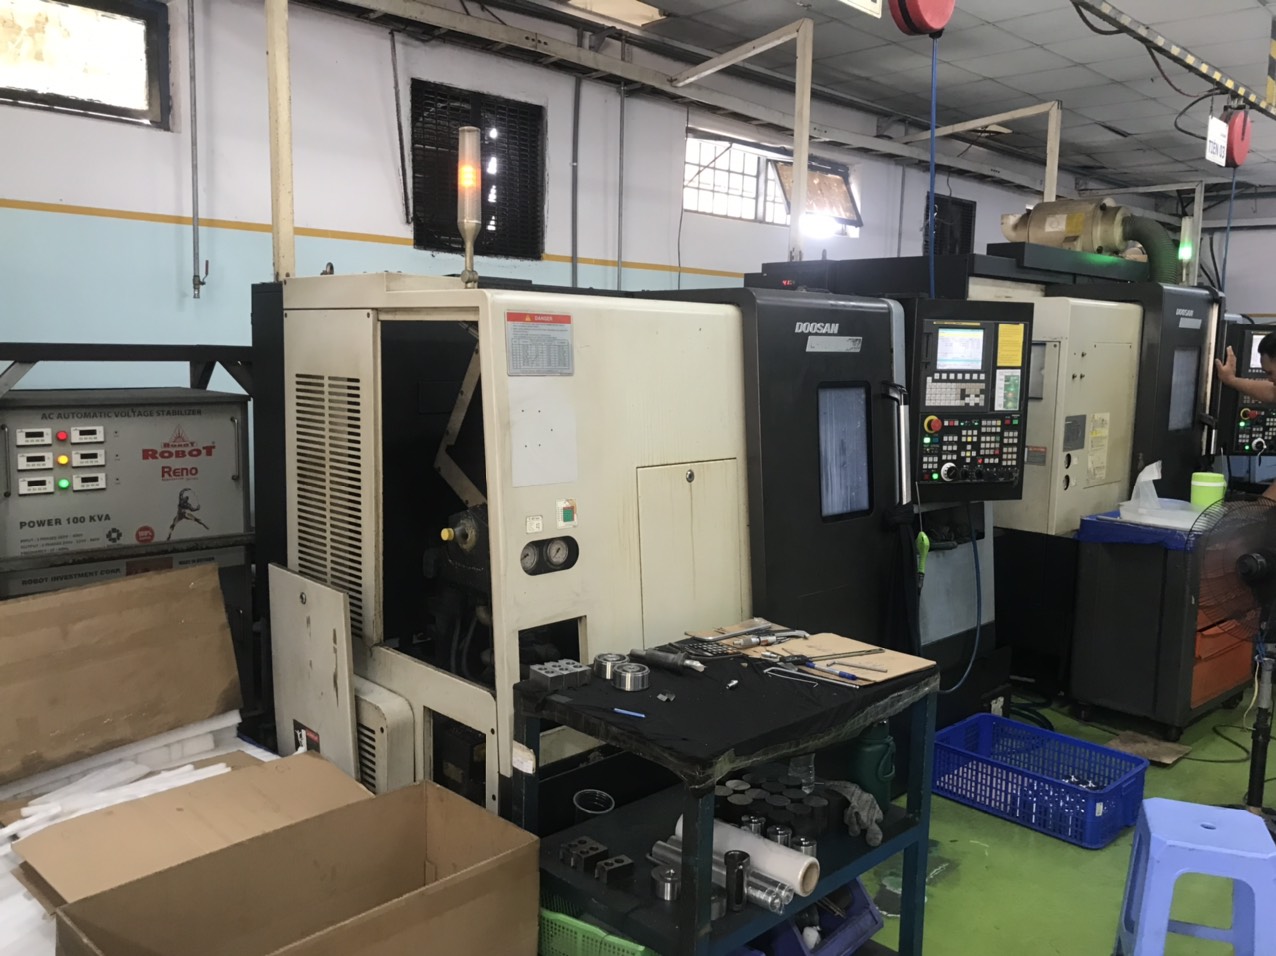
At the factory: Shared tooling, inadequate post-weld cleaning, and skipped or poorly controlled passivation are the usual culprits. Many small and mid-size fabrication shops in Asia process carbon steel and stainless steel on the same equipment.
During packaging: Carbon steel banding straps, uncoated metal fasteners in crates, or bare steel pallets can transfer iron to stainless surfaces. We have seen rust form in a perfect line where a steel strap touched the part.
During ocean transit: Containers on cargo ships pass through tropical and marine environments. Temperature swings cause condensation inside the container. If parts are not properly sealed, moisture combined with salt-laden air accelerates oxidation of any iron particles on the surface. This is especially damaging over a 30- to 45-day voyage.
At the destination warehouse: If parts are unpacked and stored on carbon steel shelving or near carbon steel inventory, the cycle continues.
Grade Selection: 304 vs. 316
While contamination is the most common cause, material grade does matter for long-term performance. Understanding how stainless steel, aluminum alloy, and carbon steel compare in sheet metal fabrication can help you make the right material choice. Here is when 304 is sufficient and when you need to upgrade to 316.
| Factor | 304 Stainless Steel | 316 Stainless Steel |
|---|---|---|
| Chromium content | ~18% | ~16% |
| Molybdenum content | None | 2–3% |
| Chloride resistance | Moderate — adequate for indoor or mild outdoor use | High — resists chloride attack in marine and chemical environments |
| Pitting corrosion resistance | Lower PREN (~18) | Higher PREN (~25) |
| Cost | Lower | ~20–30% higher |
| Recommended for | Indoor equipment, architectural, food prep (non-coastal) | Marine hardware, chemical processing, coastal environments |
If your parts will be exposed to salt spray, chlorides, or aggressive chemicals, 316 is the right choice. But even 316 will show rust spots if contaminated with free iron. Grade selection and process control are two separate issues, and both must be addressed.
What to Demand from Your Overseas Supplier
Based on our experience managing custom parts from factories across Vietnam, Taiwan, and beyond, here is what we tell clients to require in their purchase orders:
- Material test certificates (MTR/MTC) for every heat of stainless steel used
- Passivation records showing acid type, concentration, immersion time, and bath temperature
- Packaging specifications that prohibit carbon steel contact materials
- VCI paper or desiccant inside sealed polyethylene wrapping for ocean shipment
- Final inspection photos showing clean, unmarked surfaces before packing
When we manage a project, our team conducts final inspection at the factory before the container is loaded. We check the surface visually under strong lighting and verify packaging materials. This single step has eliminated nearly all incoming rust complaints for our clients.
Conclusion
Rust spots on stainless steel are almost always a process problem, not a material defect. Prevent contamination, use proper chemical cleaning, audit your supplier's passivation workflow, and control packaging to protect your custom parts from factory to warehouse. Establishing a routine for properly cleaning and maintaining sheet metal products will further extend the life and appearance of your stainless steel components. For parts used in food processing or pharmaceutical environments, make sure your supplier holds the appropriate certifications for food-grade stainless steel sheet metal fabrication.
Frequently Asked Questions
How can I prevent surface contamination and rust during the sheet metal fabrication process?
A few years back, one of our U.S. clients received a shipment of 304 stainless steel mounting brackets from a supplier in Southeast Asia. They looked perfect — until brown spots appeared within weeks. Our Vietnam office traced the issue to a single shared grinding wheel.
What are the most effective chemical treatments I should use to remove rust spots from my custom parts?
Last quarter, a purchasing manager in Ohio sent us photos of 316 stainless steel brackets with scattered brown spots. Before scrapping the batch, we asked him to try a simple oxalic acid 6 wipe. The spots vanished in minutes. The parts were fine underneath.
How do I audit my supplier's passivation and finishing processes to ensure long-term corrosion resistance?
During a supplier audit at a Vietnamese fabrication shop last year, I asked to see their passivation tank. The foreman pointed to a plastic bucket of diluted acid under a workbench. No process control. No timer. No concentration monitoring. That single observation explained why their client in Texas kept seeing rust on incoming parts.
Footnotes
1. Defines the process of shaping and assembling flat metal sheets. ↩︎
2. Details the protective passive layer on stainless steel that prevents rust. ↩︎
3. Explains the presence and detection of free iron on stainless steel surfaces. ↩︎
4. Replaced with an informational page explaining VCI paper and its function. ↩︎
5. Explains the oxidation and discoloration caused by high temperatures during welding. ↩︎
6. Details oxalic acid’s effectiveness in removing rust and stains from metals. ↩︎
7. Defines a localized form of corrosion that creates small cavities in stainless steel. ↩︎
8. Explains the chemical process to enhance stainless steel’s corrosion resistance. ↩︎
9. Refers to the standard specification for chemical passivation treatments of stainless steel. ↩︎
10. Describes an electrochemical process that removes surface defects and improves corrosion resistance. ↩︎