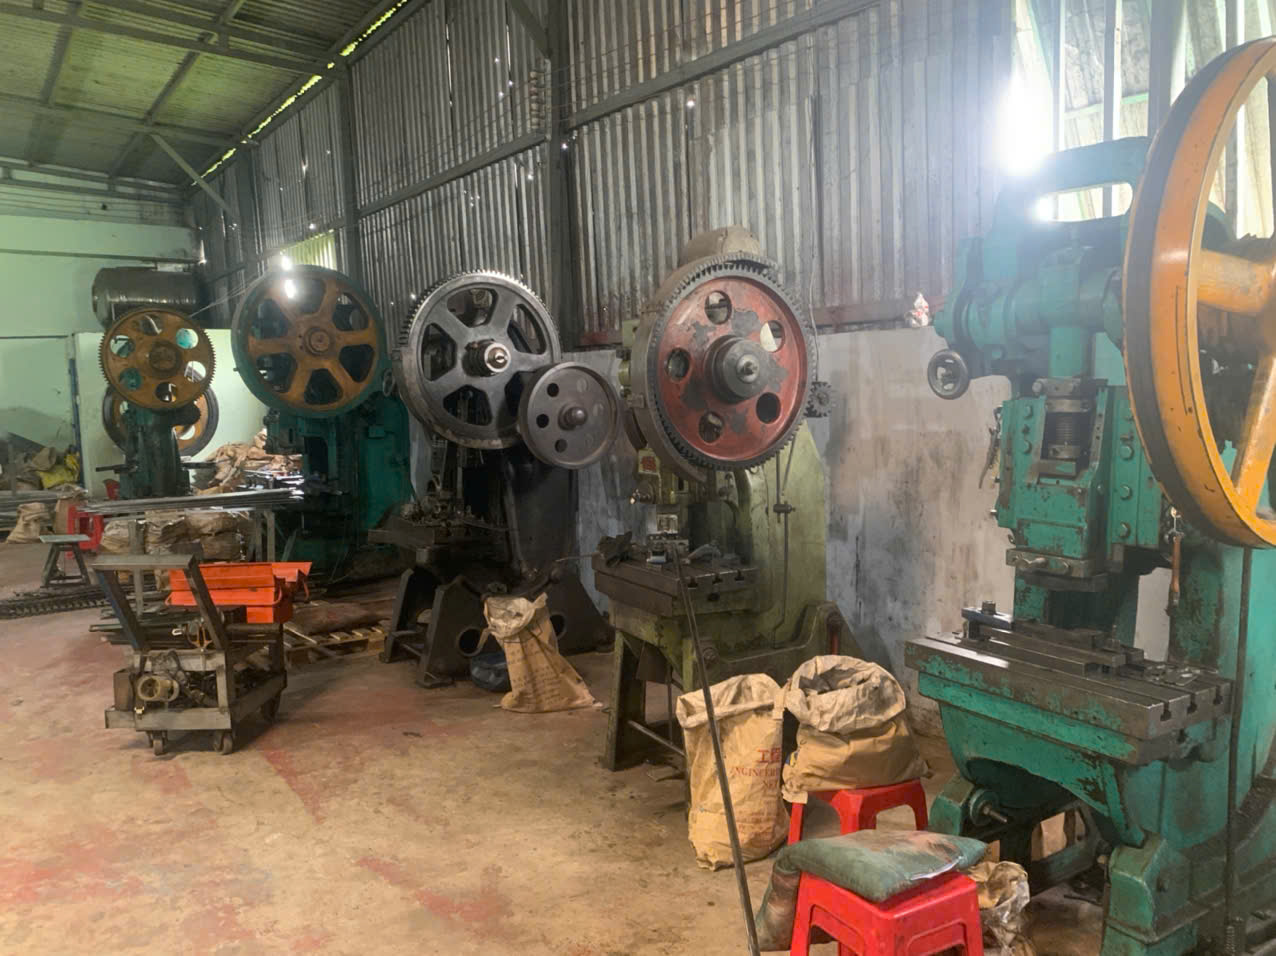

Last quarter, a U.S. client sent us a revised drawing for a mounting bracket—just two dimensions changed—and the ripple effect on our stamping dies and delivery schedule was far bigger than anyone on their team expected.
OEM design changes affect molds and production plans for stamping parts by forcing physical die rework, extending lead times through re-validation cycles, increasing tooling costs, raising scrap rates during transition runs, and disrupting production scheduling across the entire supply chain.
This article breaks down what actually happens inside the toolroom and on the press floor when an Engineering Change Order 1 lands mid-production. We will walk through the technical impacts, the scheduling fallout, strategies to reduce delays, and the quality risks you need to watch. Every section draws on real scenarios from our work coordinating stamping projects across Vietnam, China, and Taiwan for U.S. buyers.
How do design changes to stamping parts impact my existing mold tooling and costs?
A buyer we work with in the Midwest once asked us to shift a mounting hole by 3 mm on a zinc-plated bracket—seemingly minor. That single change required a new punch station, a re-machined die block, and a full re-validation run that added nearly three weeks and several thousand dollars to the project.
Design changes to stamping parts impact existing mold tooling and costs by requiring physical die modifications—cutting new steel, welding, re-machining, and re-hardening—plus new prototype runs, increased scrap, and extended lead time delays that escalate costs exponentially the later the change occurs.

Why Geometry Changes Force Physical Die Rework
A stamping die is a block of hardened tool steel 2 machined to exact dimensions. When an OEM revises part geometry—say, adjusting a bend radius from 1T to 1.5T, or moving a hole closer to a flange—the die itself must change. You cannot adjust a stamped part's shape through software alone. The steel must be cut, welded, ground, or entirely replaced.
Here is what specific geometry changes typically require:
| Design Change | Die Modification Required | Typical Impact |
|---|---|---|
| Bend radius increased (1T → 1.5T) | Reshape die radius on punch and die block | Moderate rework; 1–2 weeks |
| Hole moved closer to bend (below 2.5T + R) | New punch station; modified die block layout | Significant rework; 2–3 weeks |
| Flange height reduced below 2.5T + R | Re-machine die and possibly add secondary bending operation | Moderate to high rework |
| Material thickness changed | Re-set mold gap, re-tune press tonnage, possible new die inserts | Full re-validation required |
| New cutout or slot added | Wire EDM or CNC new feature into die | Moderate rework; 1–2 weeks |
The Mold Gap and Process Parameter Cascade
Changes that seem purely dimensional often trigger a cascade of process adjustments. For example, if an OEM switches from 1.2 mm to 1.5 mm thick steel, the optimal mold gap between the upper and lower die must change. Research shows that a narrower mold gap—around 2.00 mm versus 2.20 mm for V-shaped clamp forming—significantly reduces springback. So a thickness change does not just mean swapping steel; it means recalibrating the entire press setup: tonnage, stroke speed, and friction coefficient (ideally kept between 0.12 and 0.16).
The Cost-of-Change Curve
In our experience coordinating sheet metal fabrication across multiple Asian suppliers for U.S. clients, we consistently see the same pattern: the later a change arrives, the more it costs. During the concept phase, a design tweak costs almost nothing. During tooling, it costs thousands. During production, it can cost tens of thousands once you factor in die rework, scrapped material, production downtime, and re-qualification.
| Phase When Change Occurs | Relative Cost Multiplier | Key Cost Drivers |
|---|---|---|
| Concept / DFM review | 1× (baseline) | Engineering time only |
| After tooling approval | 10–15× | Die rework, new prototypes, re-validation |
| During production | 50–100× | All of the above plus scrap, downtime, late delivery penalties |
This is exactly why we push hard for a thorough Design for Manufacturability 3 review before any steel is cut. Our engineering team in Vietnam and China reviews every print with the tooling shop to catch issues like hole spacing violations (minimum 2T between holes) or angular tolerances tighter than ±1 degree on a 90-degree bend. These "design trip-ups" are the number one cause of expensive late-stage tool and die modification.
Tool Wear and Shortened Die Life
One factor buyers often overlook: design changes that introduce sharper corners, deeper draws, or multi-step stamping sequences increase stress on the die. This accelerates tool wear and can shorten die life by 20–40% in some cases. That means higher long-term tooling costs and more frequent maintenance shutdowns—costs that rarely appear in the initial change estimate.
What steps should I take to update production schedules after an OEM design revision?
One lesson we learned the hard way on a multi-bracket project: when the Engineering Change Order arrived, our team in Vietnam immediately communicated the tooling timeline, but we failed to recalculate the downstream impact on strip layout optimization and secondary operations. The client received an updated die completion date, but the total delivery still slipped because we had not re-planned the full production sequence.
After an OEM design revision, you should freeze the current schedule, assess die modification scope, request a detailed rework timeline from your tooling supplier, re-validate capacity and cycle time, update material procurement, and communicate revised milestones to all stakeholders before resuming production.

A Step-by-Step Process for Schedule Recovery
Here is the process we now follow whenever a design revision lands on a stamping project. It is structured to prevent the kind of cascading delays that catch buyers off guard.
Step 1: Immediately freeze the affected production line. Do not try to "run out" the old design unless the client explicitly authorizes it and the parts are still usable. Mixing old and new geometry creates traceability nightmares.
Step 2: Conduct a die modification assessment. Our tooling engineers review the revised drawing against the existing die to determine what must change. This usually takes 1–3 business days. They classify the change as minor (process parameter adjustment only), moderate (localized die rework), or major (new die sections or complete retooling).
Step 3: Build a detailed rework timeline. This includes machining, heat treatment, polishing, trial runs, and first-article inspection. Each step has its own lead time.
Step 4: Re-evaluate material requirements. A geometry change can alter the blank size 4, the strip width, or the nesting pattern. If material is already on hand, you may need to reorder. If the material grade changed, procurement lead time adds weeks.
Step 5: Recalculate cycle time and daily capacity. Changes to wall thickness, bend complexity, or the number of stations in a progressive die 5 affect how many parts the press produces per hour. If cycle time increases, the delivery date moves.
Step 6: Update all stakeholders. We issue a revised project timeline to the client, the freight forwarder, and any downstream assembly partners. Clear communication prevents supply chain disruption.
Timeline Estimation by Change Severity
| Change Severity | Typical Die Rework Time | Re-Validation Time | Total Schedule Extension |
|---|---|---|---|
| Minor (tolerance relaxation, surface finish) | 0–3 days | 1–2 days | 1–5 days |
| Moderate (hole repositioned, bend angle adjusted) | 5–15 days | 3–5 days | 2–3 weeks |
| Major (new features, material change, geometry overhaul) | 15–30+ days | 5–10 days | 4–8 weeks |
The Hidden Schedule Killers
Beyond the die itself, two factors routinely extend schedules more than buyers expect:
First, secondary operations. If the revised design eliminates a feature that was previously formed in-die (such as a lance or an emboss), that feature may now require a separate station or an offline operation. This adds handling time and a new queue in the production plan.
Second, PPAP re-submission. For automotive or high-spec industrial parts 6, any geometry change triggers a full or partial Product Part Approval Process cycle. This means dimensional reports, capability studies, and customer sign-off—often adding one to two weeks on top of the physical rework.
Production scheduling must account for both of these. A realistic schedule protects everyone. An optimistic one creates the exact delivery delays that purchasing managers like our clients dread.
How can I minimize delays when my supplier needs to modify stamping dies mid-production?
The trade-off we weigh on nearly every project is speed versus risk. Rushing a die modification to save a week often creates quality problems that cost a month. But there are concrete strategies that genuinely compress timelines without cutting corners—strategies we have refined over years of managing stamping projects between Asian suppliers and U.S. buyers.
You can minimize delays by adopting modular die architecture with interchangeable inserts, running parallel engineering reviews alongside die rework, pre-qualifying backup materials, using simulation software to validate changes before cutting steel, and maintaining open daily communication between your engineering and supplier teams.

Modular Die Architecture
The single most effective long-term strategy is designing dies with modularity in mind from the start. Instead of a monolithic die block, the tooling uses interchangeable inserts for features like punch profiles, bend radii, and trim sections. When a design change arrives, you swap or re-machine only the affected insert—not the entire die.
This approach is especially valuable for parts like the mounting brackets and spring clamps we coordinate. These components often go through two or three revisions during the first year of production as the OEM fine-tunes fit and function. Modular tooling can cut rework time by 40–60% compared to solid-block dies.
Parallel Engineering
Do not wait for the die rework to finish before starting the other steps. While the toolmaker machines the new insert, your team should simultaneously:
- Update the control plan and inspection fixtures
- Re-order material if the blank size changed
- Prepare updated PPAP documentation
- Adjust strip layout and nesting patterns for material optimization
Running these tasks in parallel instead of sequentially can save one to three weeks on a typical moderate change.
Simulation Before Steel
AI-driven predictive modeling and finite element simulation 7 are no longer luxury tools. When our suppliers receive a revised drawing, they run a forming simulation to predict springback, material flow 8, and stress distribution for the new geometry. This catches problems before any steel is cut. In one recent case, simulation revealed that a proposed flange height reduction would cause cracking at the bend line—saving us a failed trial run and at least a week of rework.
Communication Cadence
From our experience managing projects across multiple time zones, the biggest delay amplifier is communication lag. A question that sits unanswered for 48 hours can push a die rework completion out by a full week. We maintain daily status updates between the tooling shop, our quality team, and the client during any active modification. This is not overhead—it is schedule insurance. Understanding how to evaluate supplier responsiveness to design changes is critical when selecting partners who can handle mid-production revisions without excessive delays.
Backup Strategies
For critical production parts, consider maintaining a second set of wear-prone die components (punches, bushings, guide pins). This way, when a modification is needed, you can work on one set while the other keeps running the current design until the switchover point. This minimizes production downtime during the transition.
What quality risks should I watch for when molds are adjusted for design changes?
During a recent project involving Z-shaped spring clamps, we discovered that a die modification to adjust the gripping lip angle introduced a subtle burr direction change. The parts passed dimensional inspection but caused assembly interference at the client's plant. That experience reinforced a critical point: dimensional conformance after a die change is necessary but not sufficient.
Quality risks after die adjustment include dimensional drift from improper die alignment, increased burr height or direction change, springback variation from altered mold gap, surface finish degradation from re-machined die faces, material stress cracking near modified features, and inconsistent part quality during the ramp-up period before process parameters stabilize.

The Ramp-Up Risk Window
Every die modification creates a "risk window"—the period between the first hit on the modified die and the point where the process is statistically stable. During this window, rework and scrap rates spike. Parts may look acceptable but fall outside tolerance on critical dimensions. In our quality control process, we require 100% inspection of the first 50–100 pieces off a modified die, followed by statistical sampling 9 once Cpk values confirm stability.
Specific Quality Risks and How to Detect Them
| Quality Risk | Root Cause | Detection Method |
|---|---|---|
| Dimensional drift | Die halves misaligned after reassembly | First-article CMM inspection; GD&T verification |
| Burr height exceeds 10% of material thickness | Punch-to-die clearance 10 incorrect after rework | Visual inspection; burr height gauge |
| Burr direction reversal | Die orientation changed during modification | Cross-section check; assembly trial |
| Springback increase | Mold gap not re-optimized for new geometry | Bend angle measurement; comparison to simulation |
| Surface scratches or marks | Re-machined die face not polished to original finish | Visual inspection under angled light |
| Cracking at bend lines | Bend radius reduced below 1T or material grain direction ignored | Dye penetrant testing; bend testing |
| Inconsistent hole diameter | Punch worn or re-ground to incorrect size | Go/no-go pin gauge; CMM measurement |
Process Parameter Re-Optimization
After any die modification, the press settings must be re-tuned. This includes tonnage, stroke length, feed rate, and lubrication. If the material or thickness changed, the friction coefficient between the sheet and die surface shifts—ideally you want it between 0.12 and 0.16. Outside this range, you get galling, tearing, or excessive springback.
Our quality team in China and Vietnam follows a structured re-optimization protocol: we start with conservative settings (lower speed, lighter tonnage), measure the first parts, and incrementally adjust toward the target. This methodical approach prevents the "just crank it and see" mentality that leads to cracked dies and scrapped production runs.
The DFM Feedback Loop
The best long-term defense against quality risks from design changes is a tight feedback loop between the OEM's design team and the stamping supplier's tooling engineers. When our clients involve us early—during the design concept phase—we flag features that are difficult to maintain quality on after modification. For example, flatness requirements tighter than 0.003 inches per inch are achievable but fragile; any die rework in that area risks losing the tolerance. If the flatness is not functionally critical, relaxing it provides a quality buffer for future changes.
Wall thickness variation is another area we watch closely. If different sections of a stamped part require different thicknesses, the differentiation should stay within 10%. Beyond that, the die modification needed to achieve the variation introduces uneven stress that degrades quality over time.
Why "Right First Time" Matters Even More After a Change
For purchasing managers who have dealt with suppliers lacking strict quality control, the post-modification period is the highest-risk moment. This is when shortcuts show up: skipped first-article inspections, process parameters copied from the old setup without adjustment, or operators running at full speed before the die is proven stable. Our approach is to treat every die modification as a mini-launch, with the same rigor we apply to initial production. That discipline is what makes the difference between a smooth transition and a costly quality escape.
Conclusion
OEM design changes are inevitable, but the damage they cause to stamping dies, production schedules, and part quality is not. Early DFM collaboration, modular tooling, simulation-driven validation, and disciplined post-modification quality control turn reactive chaos into manageable transitions—protecting both your timeline and your bottom line. Understanding what factors influence fabrication pricing can also help you anticipate cost impacts before committing to a design revision.
Frequently Asked Questions
How do design changes to stamping parts impact my existing mold tooling and costs?
A buyer we work with in the Midwest once asked us to shift a mounting hole by 3 mm on a zinc-plated bracket—seemingly minor. That single change required a new punch station, a re-machined die block, and a full re-validation run that added nearly three weeks and several thousand dollars to the project.
What steps should I take to update production schedules after an OEM design revision?
One lesson we learned the hard way on a multi-bracket project: when the Engineering Change Order arrived, our team in Vietnam immediately communicated the tooling timeline, but we failed to recalculate the downstream impact on strip layout optimization and secondary operations. The client received an updated die completion date, but the total delivery still slipped because we had not re-planned the full production sequence.
How can I minimize delays when my supplier needs to modify stamping dies mid-production?
The trade-off we weigh on nearly every project is speed versus risk. Rushing a die modification to save a week often creates quality problems that cost a month. But there are concrete strategies that genuinely compress timelines without cutting corners—strategies we have refined over years of managing stamping projects between Asian suppliers and U.S. buyers.
Footnotes
1. Authoritative Wikipedia entry defining the formal ECO process in manufacturing. ↩︎
2. Reliable Wikipedia resource explaining the properties and types of tool steel. ↩︎
3. Authoritative Wikipedia guide on optimizing product design for manufacturing efficiency. ↩︎
4. Describes the initial metal shape used in stamping before forming operations begin. ↩︎
5. Describes the multi-station tooling process used for high-volume stamping production. ↩︎
6. References the international quality standard for automotive industry manufacturing and part approval. ↩︎
7. Comprehensive Wikipedia overview of the finite element method used in engineering simulations. ↩︎
8. Wikipedia entry explaining the mechanics of metal forming and material behavior. ↩︎
9. Describes the statistical methods used to ensure consistent quality across production batches. ↩︎
10. Authoritative Wikipedia page detailing die manufacturing and the importance of clearance. ↩︎