

Dimensional parameters for stamping parts decide whether your shipment assembles or gets rejected ISO 2768-m 1. I have watched buyers lose weeks because one drawing left a critical hole position ambiguous. When our team audits stamping suppliers across Vietnam and Asia, the same gaps keep appearing: unclear tolerances, missing datums, and thickness assumptions nobody verified coordinate measuring machine 2. The result is scrap, rework, and angry end customers. The fix is knowing which dimensions truly control fit and function, and specifying only those tightly.
The most important dimensional parameters when buying stamping parts are material thickness, hole size and position, bend angle and radius, flange height, edge distance, and flatness. Control fit-critical dimensions tightly, apply GD&T with clear datums, and leave non-functional features at standard tolerances to reduce cost.
Let me break this down the way we review drawings before every RFQ. We will cover tolerances, critical dimensions, thickness variation, and how to verify everything with real measurement methods.
What Tolerance Levels Should I Specify to Avoid Non-Conforming Stamping Parts?
A U.S. purchasing manager once sent us a bracket drawing with ±0.05 mm on every single dimension. Our engineers flagged it immediately. That print would have doubled his tooling cost for zero functional gain.
Specify tight tolerances only on critical-to-function dimensions—typically 5–15% of all dimensions on a drawing—and default the rest to a standard class like ISO 2768-m or DIN 6930. Realistic stamping tolerances range from ±0.05 mm on pierced holes to ±1° on bend angles.
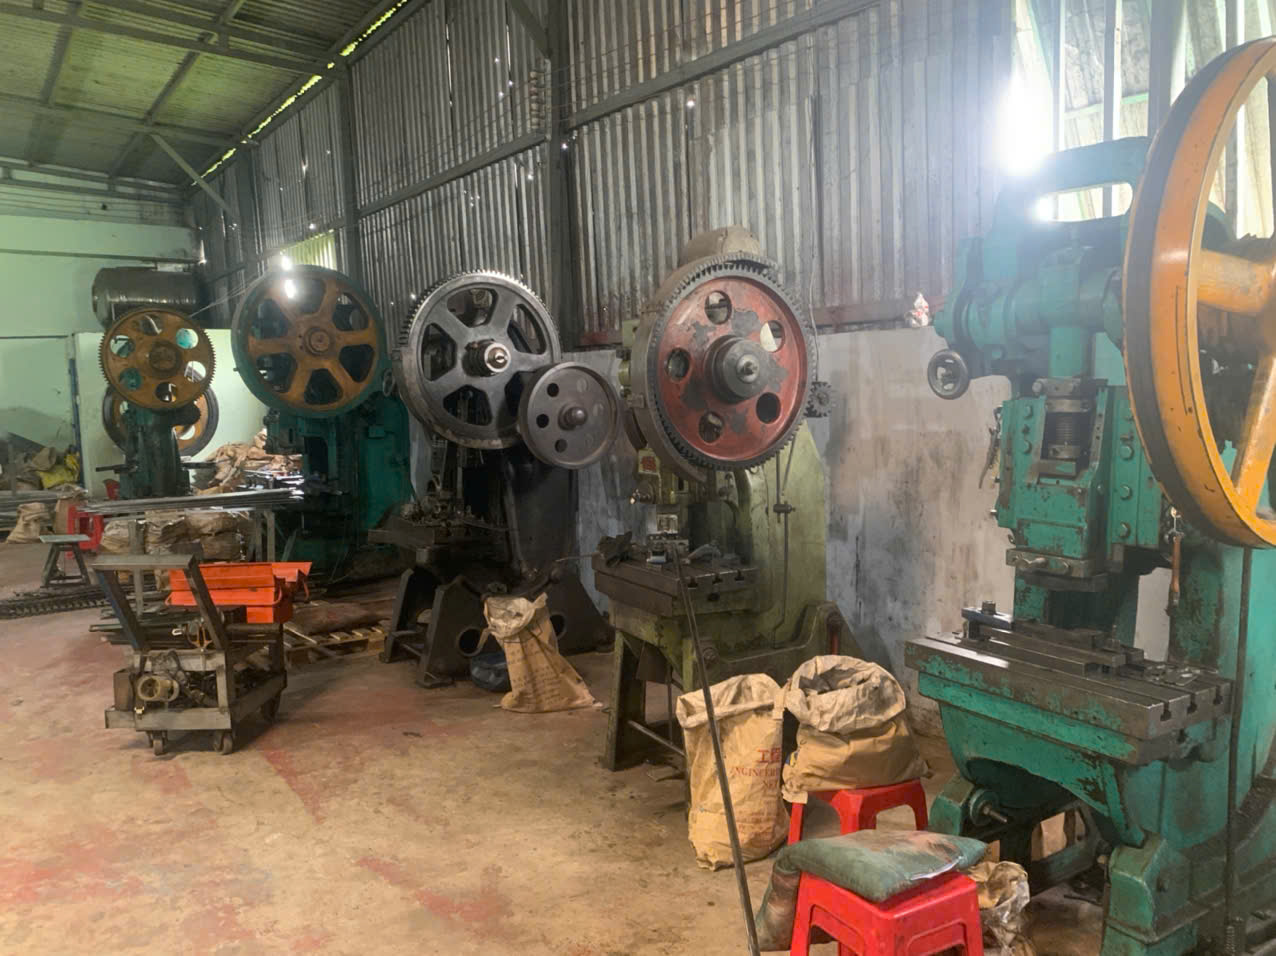
Over-tolerancing is the single most expensive mistake I see on stamping drawings. Tight tolerances everywhere force the stamper to slow production, add secondary operations, and inspect more features. All of that lands in your unit price. Worse, it creates false rejections. A part gets flagged for a dimension that never mattered, and your shipment sits in quarantine.
Match the Tolerance to the Process
Stamping is not machining. A progressive die 3 can hold pierced hole diameters very tightly because the punch defines the size. But formed features move. Springback 4 shifts bend angles. Material lot variation shifts flange heights. Your tolerance strategy has to respect that difference.
Here is the framework we use when reviewing client drawings before quoting:
| Feature Type | Typical Achievable Tolerance | When to Tighten |
|---|---|---|
| Pierced hole diameter | ±0.05 to ±0.10 mm | Press-fit or pilot holes |
| Hole-to-hole position | ±0.10 to ±0.25 mm | Multi-hole bolt patterns |
| Bend angle | ±0.5° to ±1° | Mating flange surfaces |
| Flange height | ±0.25 to ±0.50 mm | Stack-up in assemblies |
| Overall blank profile | ±0.10 to ±0.30 mm | Envelope fit in housings |
| Flatness (per 100 mm) | 0.2 to 0.5 mm | Sealing or datum surfaces |
Use a Three-Bucket Strategy
We ask clients to sort dimensions into three buckets. Must-control: hole positions, bend angles, mating surfaces. Should-control: bend radius, edge distance, flange height. Reference-only: cosmetic edges and non-functional profiles. This sorting alone prevents most non-conformance disputes, because everyone agrees upfront on what actually gets measured and gated.
Also state your general tolerance standard in the title block. If the drawing says nothing, the supplier will assume their own shop standard. That assumption is where non-conforming parts are born.
How Do I Determine Which Critical Dimensions Need Tighter Control on My Drawings?
During a supplier audit in Vietnam last year, I compared two versions of the same clip drawing. The revised one had datums and four flagged critical dimensions. Scrap on that part dropped noticeably after the change.
Identify critical dimensions by tracing how the part assembles: hole locations that align with fasteners, bend angles that set mating surfaces, envelope dimensions that fit housings, and any feature in a tolerance stack-up. Flag these with GD&T callouts tied to functional datums.

The question to ask about every dimension is simple: what breaks if this drifts? If the answer is "nothing," it is not critical. If the answer is "the screw won't line up" or "the panel won't seat," it belongs in your must-control bucket.
Start From the Assembly, Not the Part
Look at a typical Z-fold mounting clip with a single screw hole. The hole position relative to the mounting face is critical. The screw must land on the mating thread. The outer profile edge? Usually not critical at all. Yet many drawings tolerance both the same way. Work backward from the assembly interface and the priorities become obvious.
Why GD&T Beats Scattered Linear Dimensions
For formed parts, chains of ± dimensions create ambiguity. Where do you measure a bend angle when the radius blends into two faces? GD&T 5 solves this. In our experience preparing PPAP packages for U.S. clients, position, profile, flatness, and perpendicularity callouts prevent most measurement disputes because they define the datum scheme explicitly.
| GD&T Control | Best Used For | Why It Helps Buyers |
|---|---|---|
| True position | Hole and slot locations | Captures real fastener alignment, allows bonus tolerance |
| Profile of a surface | Formed flanges, trim edges | One callout controls form, size, and location together |
| Flatness | Mounting faces, sealing surfaces | Prevents rocking and gaps after assembly |
| Perpendicularity | 90° bent flanges | Controls springback effect directly at the function |
| Angularity | Non-90° bends | Defines the angle relative to a real datum face |
Watch the Stack-Up
In progressive dies, each station adds a little variation. Pilot accuracy, strip stretch, and die flex all compound. If your part has a row of holes and mates with another stamped part, evaluate the cumulative stack-up, not each hole alone. We ask suppliers for their station-by-station capability data on multi-hole parts before tooling kicks off. That one habit catches compounding errors early.
Which Material Thickness Variations Could Affect My Stamping Part's Final Fit?
One lesson our team learned the hard way: a client's clips kept failing insertion force tests. The drawing was fine. The coil was not. The mill had shipped stock at the low end of the thickness band, and the spring tension dropped with it.
Material thickness variation affects stamping fit because bend radius, springback, flange height, hole quality, and edge distance all scale from thickness. Mill tolerance on sheet stock can run ±5–10% of nominal, so specify the thickness band and verify it with mill certificates.

Thickness is the master variable in stamping. Nearly every design rule references it. When thickness drifts, everything downstream drifts with it, even if the die never changes.
How Thickness Drives Every Other Rule
These thickness-based ratios are the baseline checks we run on every stamping drawing before an RFQ goes out:
| Design Rule | Recommended Minimum | Reason |
|---|---|---|
| Hole diameter | 1.2× thickness (ductile); 2× for stainless | Prevents punch breakage and hole distortion |
| Slot and tab width | 1.5× thickness | Avoids tool stress and feature deformation |
| Hole-to-edge distance | 2× thickness | Stops edge bulging and tearing |
| Hole-to-bend distance | 2× thickness from the bend radius | Bending pulls material and distorts nearby holes |
| Inside bend radius | 0.5× thickness (more for hard alloys) | Reduces cracking and springback scatter |
| Corner radius | 0.5× thickness | Limits die wear and burr formation |
| Flange height | 2.5× thickness plus bend radius | Ensures economical, stable forming |
What Actually Moves When Thickness Varies
Thinner stock springs back more, so bend angles open up. Thicker stock changes the neutral axis, so developed flat lengths shift and flange heights move. Punched holes get more rollover and taller burrs when clearance-to-thickness ratios change. And in assemblies where stamped parts stack, thickness variance compounds directly into stack height.
Material grade matters just as much. Stainless steel 6, aluminum, copper, and low-carbon steel each recover differently after forming. Generic springback averages are not enough; the allowance should reflect the specific alloy, temper, and grain direction. That is why we require mill certificates on every coil lot for critical parts, and why we ask stampers to record actual measured thickness at setup, not just the nominal on the packing list.
What Measurement Methods Should My Supplier Use to Verify Dimensional Accuracy?
Before we approve any stamping supplier for our U.S. clients, I sit in their quality room and watch them measure a real part. The gauges on the bench tell me more than any brochure ever will.
Suppliers should verify stamping dimensions with calibrated micrometers for thickness, pin gauges and plug gauges for holes, CMM or optical comparators for positions and profiles, angle gauges for bends, and surface plates with feeler gauges for flatness—documented in a dimensional report tied to your drawing.

The right measurement method depends on the feature, the tolerance, and the production volume. A caliper is fine for a non-critical profile. It is not fine for a true-position callout on a bolt pattern.
Match the Tool to the Feature
Here is the mapping we expect to see in a capable stamping shop:
- Thickness: point micrometer, checked against the mill certificate at coil changeover.
- Hole diameter: go/no-go pin gauges for speed in production; plug gauges for records.
- Hole position and pitch: CMM or vision measurement system, referenced to the drawing datums.
- Bend angle: digital protractor or dedicated angle gauge, measured after springback stabilizes.
- Profile and trim edges: optical comparator or profile projector against an overlay.
- Flatness and warpage: surface plate with feeler gauges, or a dial indicator sweep.
- Burr height and rollover: burr gauge or microscope with edge-section checks.
Demand Process Control, Not Just Final Inspection
Final inspection catches bad parts. Process control prevents them. In our PPAP 7 and process-control work, we ask suppliers for first-article reports on every tool change, in-process checks at defined intervals, and capability data on the flagged critical dimensions. Fixtures matter too. Formed parts flex, so checking a bend angle in a proper holding fixture gives repeatable numbers; checking it by hand does not. Finally, insist the dimensional report uses your balloon numbers from the drawing. When every measured value traces to a numbered feature, disputes get resolved in minutes instead of weeks.
Conclusion
Non-conforming stamping parts drain budgets and schedules. The cure is disciplined dimensional parameters: control fit-critical features, respect thickness-based rules, use GD&T, and verify with proper measurement. Get the drawing right, and production follows.
Frequently Asked Questions
What Tolerance Levels Should I Specify to Avoid Non-Conforming Stamping Parts?
A U.S. purchasing manager once sent us a bracket drawing with ±0.05 mm on every single dimension. Our engineers flagged it immediately. That print would have doubled his tooling cost for zero functional gain.
How Do I Determine Which Critical Dimensions Need Tighter Control on My Drawings?
During a supplier audit in Vietnam last year, I compared two versions of the same clip drawing. The revised one had datums and four flagged critical dimensions. Scrap on that part dropped noticeably after the change.
Which Material Thickness Variations Could Affect My Stamping Part's Final Fit?
One lesson our team learned the hard way: a client's clips kept failing insertion force tests. The drawing was fine. The coil was not. The mill had shipped stock at the low end of the thickness band, and the spring tension dropped with it.
Footnotes
1. Official ISO standard page for the general tolerance class mentioned. ↩︎
2. Wikipedia background on CMM technology used for dimensional verification. ↩︎
3. Wikipedia explanation of progressive die stamping process mentioned in article. ↩︎
4. Background concept on springback in metal forming discussed repeatedly. ↩︎
5. Explains geometric dimensioning and tolerancing concept referenced throughout the article. ↩︎
6. Background on stainless steel material properties affecting springback behavior.