
I have seen too many procurement teams send drawings to suppliers without checking key deep drawing stamping parts specifications first — then face costly rework, rejected batches, and months of delay.
When purchasing deep drawing stamping parts, you must verify material ductility and elongation, specify the limiting draw ratio, define corner radii relative to material thickness, set realistic dimensional tolerances, and confirm the supplier’s tooling and quality control capabilities before committing to an order.
Every detail matters. A wrong radius, a vague tolerance call-out, or a poorly chosen steel grade can turn a straightforward part into a nightmare AISI 1008–1010 1. Below, I break down the exact technical points you need to lock down before you send that RFQ.
How Do I Choose the Right Material and Thickness for Deep Drawing Stamping Parts?
A lesson we learned early on our Vietnam production floor: a U.S. client once specified a 304 stainless steel 2 for a deep-drawn housing, but the supplier used a batch with elongation below 25% strain hardening exponent 3. Every third part cracked at the bottom radius. The fix required sourcing a new coil and re-running the entire lot plastic strain ratio 4.
Choose materials with elongation values above 30%, a yield-to-tensile strength ratio below 0.65, and a high plastic strain ratio (r-value). Low-carbon steels like AISI 1008–1010, aluminum 1100/3003, and copper C11000 are proven deep drawing grades that resist thinning and cracking.

Why Ductility Is the Single Most Important Spec
Material ductility and elongation determine whether a blank can flow into a die cavity without tearing statistical process control 5. In deep drawing, the metal must stretch and compress simultaneously. If the material is too hard or too brittle, it cracks. If it is too soft without adequate strain hardening, it wrinkles.
Two numbers tell you almost everything:
- n-value (strain hardening exponent): A higher n-value (above 0.20) means the material distributes strain more evenly. This prevents localized thinning.
- r-value (plastic strain ratio): A higher r-value (above 1.5) means the material resists thinning in the thickness direction and flows more readily in the plane of the sheet.
When our engineering team reviews a new deep drawing project, we always request the mill certificate and check these values before approving the material.
Recommended Material Grades
| Material | Typical Elongation | Yield/Tensile Ratio | Best For |
|---|---|---|---|
| AISI 1008 Low-Carbon Steel | 35–45% | 0.50–0.60 | General structural brackets, housings |
| AISI 1010 Low-Carbon Steel | 32–42% | 0.52–0.62 | Automotive cups, enclosures |
| Aluminum 1100 | 35–45% | 0.45–0.55 | Lightweight housings, cookware |
| Aluminum 3003 | 30–40% | 0.50–0.60 | Moderate-strength drawn shells |
| Copper C11000 | 40–50% | 0.40–0.50 | Electrical connectors, heat sinks |
| 304 Stainless Steel (DD Grade) | 40–55% | 0.45–0.55 | Corrosion-resistant enclosures |
Thickness Considerations
Wall thickness uniformity is never perfect in a deep-drawn part. Expect 10–15% thinning at the bottom radius and 15–20% thickening at the flange. If your design requires a minimum wall thickness for structural reasons, start with a thicker blank to compensate for sheet metal thinning during the draw.
Also consider that thicker materials require higher blank holder pressure and more robust progressive die tooling. Tooling cost amortization increases with heavier gauges because dies wear faster.
A uniform chemical composition across the coil is equally important. Variations in carbon or manganese content within the same coil can cause localized tearing. We always request coil-end test reports, not just the mill average, to catch this.
What Tolerance and Dimensional Standards Should I Specify in My Drawings?
One trade-off we constantly help U.S. clients navigate is the tension between tight tolerances and realistic cost. A purchasing manager once asked for ±0.001" on every dimension of a simple cylindrical cup. The tooling quote came back 40% higher than expected — because most of those tight calls were unnecessary.
For average deep-drawn parts, specify length tolerances of ±0.005" and diameter tolerances of ±0.001" to ±0.002". Reserve critical tolerances for mating surfaces and functional features only. Over-tolerancing simple parts increases tooling cost without adding functional value.
Standard vs. Critical Tolerances
Not every dimension on a deep-drawn part needs the same level of precision. The physics of the process — metal flowing, thinning, and springing back — make it impractical to hold ultra-tight tolerances everywhere.
Here is a practical classification we use when reviewing client drawings:
| Part Complexity | Length-to-Diameter Ratio | Length Tolerance | Diameter Tolerance | Visual Requirements |
|---|---|---|---|---|
| Simple | 1.5 – 2.5x | ±0.005" | ±0.002" | Non-critical |
| Average | 2.5 – 3.5x | ±0.005" | ±0.001" | Average |
| Difficult | > 5.0x | Critical (case-by-case) | Critical (case-by-case) | Critical |
Corner Radii: The Most Overlooked Dimension
Corner radii are the number one failure point in deep drawing. The rule of thumb is:
- Punch radius: 4x–8x material thickness
- Die entry radius: 6x–10x material thickness
Radii smaller than these thresholds cause shearing or tearing. We have seen buyers request sharp 90° internal corners on drawn cups — that is physically impossible without secondary machining. If your assembly requires a tight corner, plan for a post-draw coining or machining operation and budget accordingly.
The Draw Ratio Reality Check
The limiting draw ratio (LDR) — the ratio of blank diameter to punch diameter — caps what you can achieve in a single press stroke. For most materials:
- Single-stage draw: LDR of 1.8–2.3
- LDR above 2.3–3.0: Requires two or three draw stages
- LDR above 3.0: Demands multi-stage progressive drawing
If your part has a length-to-diameter ratio above 5.0x, tell your supplier upfront. They will need progressive die tooling, and the quote will reflect the additional stations and transfer mechanisms.
Draft Angles and Wall Thinning
Adding a 1°–3° draft angle to vertical walls reduces friction during the draw and improves metal flow. Some buyers resist this because it changes the part geometry. But the trade-off is real: skipping the draft increases the risk of galling, tool wear, and defects.
Similarly, dimensional tolerances on wall thickness must account for the inherent thinning. A drawn wall is always thinner than the original blank, especially near the bottom radius. If your functional requirement demands a minimum wall, call it out explicitly and let the supplier back-calculate the starting gauge.
In some cases, stress relief annealing between draw stages can help restore ductility for subsequent reductions. This adds cycle time and cost, but it is essential for difficult parts to maintain dimensional stability and prevent springback.
How Can I Evaluate a Supplier's Deep Drawing Capabilities Before Placing an Order?
A buyer interaction I recall vividly: a client in Ohio had been burned twice by suppliers who claimed deep drawing expertise but actually outsourced the work to sub-tier shops with no process control. By the time defective parts arrived stateside, the project was three months behind.
Evaluate a supplier's deep drawing capabilities by auditing their press tonnage range, tooling design team, simulation software (such as AutoForm), draw stage capacity, in-process inspection equipment, and track record with similar part geometries and materials before you commit to tooling investment.

What to Look for in a Facility Audit
When our team audits potential suppliers in Vietnam or other Asian manufacturing hubs, we follow a structured checklist. Here is what matters most:
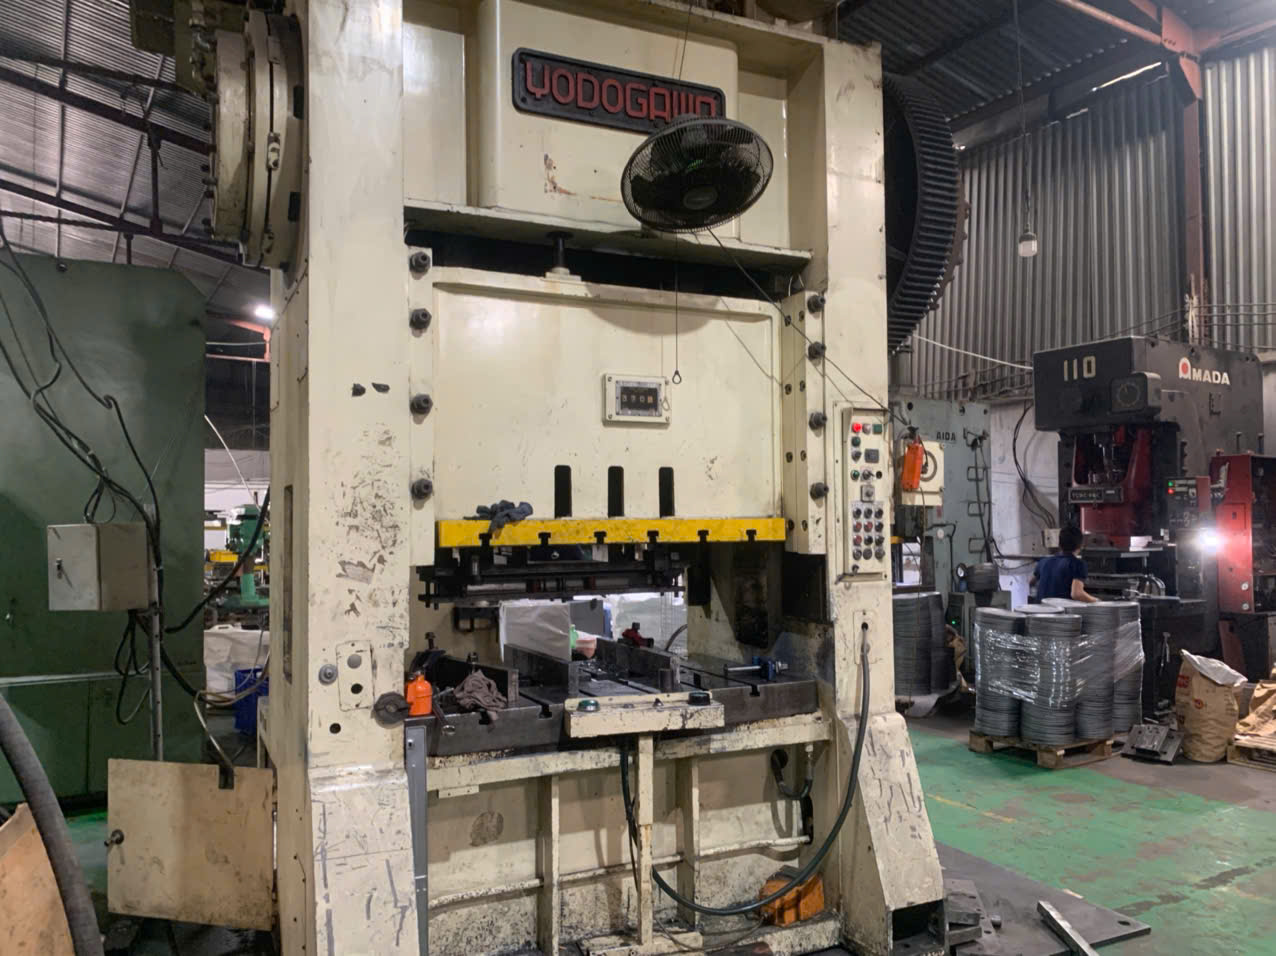
Press Equipment: Does the supplier have hydraulic or mechanical presses in the right tonnage range for your part? Deep drawing typically requires slower stroke speeds than standard stamping. Servo-driven presses offer better control over blank holder pressure and punch speed profiles.
Tooling Design Capability: Can the supplier design and build their own dies in-house? Or do they outsource tooling? In-house tooling means faster iteration and lower cost for modifications. Ask to see examples of progressive die tooling they have built for parts with similar draw ratios.
Simulation Software: The use of forming simulation software like AutoForm or PAM-STAMP is no longer optional for complex geometries. Simulation predicts metal flow, thinning, wrinkling risk, and springback before a single dollar is spent on steel. Ask the supplier if they run simulations and request sample reports.
Key Questions to Ask a Prospective Supplier
- What is the maximum draw depth you have achieved in a single stage?
- How many draw stations can your transfer press accommodate?
- What is your standard tooling clearance setting relative to material thickness? (Look for answers in the 1.1–1.3x range, or 107–115% of material thickness.)
- Do you have adjustable blank holder force systems (pneumatic or servo)?
- What lubrication systems do you use? Are they compatible with the material I need?
- Can you provide PPAP documentation 6, including process capability studies?
Lubrication and Surface Finish Considerations
Lubrication matters more than many buyers realize. The wrong lubricant can cause galling, surface defects, or staining that is impossible to remove post-draw. Common lubricant types include mineral oil, synthetic compounds, dry-film coatings, and phosphate coatings for stainless steel.
Ask about surface roughness standards on both the tooling and the finished part. A die surface that is too smooth can trap lubricant and cause hydroplaning; too rough and it scratches the part. Sub-micron surface topography and lay direction on the die cavity directly affect metal flow and part finish quality.
On our projects, we also verify that the supplier's lubrication system is compatible with any downstream processes like welding, painting, or powder coating. Residual lubricant can contaminate welds or cause paint adhesion failures.
What Quality Control Checks Should I Require to Avoid Defects Like Wrinkling or Cracking?
During a recent project for a U.S. automotive hardware distributor, we caught a subtle wrinkling defect on a drawn bracket flange that the supplier's final inspection had missed. The wrinkles were less than 0.3 mm in height — nearly invisible to the naked eye — but enough to cause fitment problems during assembly. That experience reinforced why prescriptive QC requirements matter.
To prevent wrinkling, cracking, and other deep drawing defects, require first-article inspection with dimensional reports, in-process blank holder pressure monitoring, surface roughness checks, wall thickness measurements at critical zones, and statistical process control charting on every production run.

Common Deep Drawing Defects and Their Root Causes
Understanding what goes wrong — and why — helps you write better inspection criteria.
| Defect | Root Cause | Prevention Method |
|---|---|---|
| Wrinkling (flange) | Insufficient blank holder pressure | Increase blank holder force to 25–50% of punch force |
| Wrinkling (wall) | Excessive clearance between punch and die | Reduce clearance to 1.1–1.3x material thickness |
| Cracking (bottom radius) | Radius too small or material too brittle | Use punch radius ≥ 4x thickness; verify elongation > 30% |
| Earing (uneven flange) | Material anisotropy | Use material with high, uniform r-value; trim after drawing |
| Orange peel surface | Coarse grain structure | Specify fine-grain material; control annealing temperature |
| Springback | Elastic recovery after forming | Compensate in die design; use stress relief annealing |
In-Process Controls You Should Mandate
Do not rely solely on final inspection. By the time a part reaches the end of the line, a systemic defect may have already ruined hundreds of pieces. Mandate these in-process checks:
- Blank holder pressure monitoring: Force should be logged continuously. Modern servo presses can adjust blank holder pressure dynamically during each stroke. If the supplier uses a fixed-force system, verify it is calibrated at least every shift.
- Wall thickness measurement: Use ultrasonic thickness gauges at the bottom radius, mid-wall, and flange at defined intervals (e.g., every 100th part or every coil change).
- Surface inspection: Visual checks under controlled lighting for scratches, galling, and orange peel. For critical visual surfaces, specify surface roughness standards (e.g., Ra ≤ 0.8 µm).
Emerging Monitoring Technologies
Some advanced suppliers now use acoustic emission monitoring to detect micro-cracking during the draw stroke in real time. Sensors on the die detect the acoustic signature of crack initiation before it propagates to a visible defect. This is still a developing technology, but it is worth asking about if your parts are safety-critical.
Finite element analysis 7 (FEA) using kinematic hardening models can also predict where cracks are most likely to occur. If a supplier runs these simulations during the tooling design phase, the risk of in-production cracking drops significantly.
The Role of PPAP and Process Documentation
For any mid-to-high quality requirement project — which is the core of what we manage at DEWIN — we require full PPAP documentation 8 from the supplier. This includes:
- Control plans with reaction procedures for out-of-spec measurements
- Process flow diagrams showing every draw stage, annealing step, and secondary operation
- Measurement system analysis (MSA) for all gauges used in inspection
- Initial process capability studies 9 (Cpk ≥ 1.33 minimum)
This documentation is not just bureaucracy. It forces the supplier to think through every variable before production starts. In our experience, suppliers who resist PPAP are often the ones who struggle with first-time quality.
Tooling cost amortization should also be discussed early. If your annual volume justifies dedicated tooling, insist on knowing the expected die life and the supplier's plan for tool maintenance and replacement. A worn die is the most common cause of gradual tolerance drift and surface degradation.
Conclusion
Getting deep drawing stamping parts right starts long before you place an order. Verify material ductility, set realistic tolerances, audit your supplier's capabilities, and mandate rigorous in-process quality controls — these steps protect your timeline, budget, and reputation. If you are new to sourcing stamped components, understanding the broader stamping processes and technical parameters will also help you communicate more effectively with suppliers and avoid common purchasing pitfalls.
Frequently Asked Questions
How Do I Choose the Right Material and Thickness for Deep Drawing Stamping Parts?
A lesson we learned early on our Vietnam production floor: a U.S. client once specified a 304 stainless steel 2 for a deep-drawn housing, but the supplier used a batch with elongation below 25% strain hardening exponent 3 . Every third part cracked at the bottom radius. The fix required sourcing a new coil and re-running the entire lot plastic strain ratio 4 .
What Tolerance and Dimensional Standards Should I Specify in My Drawings?
One trade-off we constantly help U.S. clients navigate is the tension between tight tolerances and realistic cost. A purchasing manager once asked for ±0.001" on every dimension of a simple cylindrical cup. The tooling quote came back 40% higher than expected — because most of those tight calls were unnecessary.
How Can I Evaluate a Supplier's Deep Drawing Capabilities Before Placing an Order?
A buyer interaction I recall vividly: a client in Ohio had been burned twice by suppliers who claimed deep drawing expertise but actually outsourced the work to sub-tier shops with no process control. By the time defective parts arrived stateside, the project was three months behind.
Footnotes
1. Background on deep drawing process explains material behavior discussed in article. ↩︎
2. ISO standard governs stainless steel grades relevant to deep drawing material specs. ↩︎
3. Technical concept referenced directly needs authoritative background explanation. ↩︎
4. Defines the r-value metric central to material selection discussion. ↩︎
5. ISO standard covers SPC methodology referenced for production quality monitoring. ↩︎
6. ISO/IATF standard underlies PPAP quality documentation requirements mentioned. ↩︎
7. Explains the simulation method used to predict cracking during forming. ↩︎
8. AIAG defines PPAP standards referenced for supplier quality documentation requirements. ↩︎
9. Clarifies Cpk metric used as minimum quality benchmark in the article. ↩︎